
An Eco-Friendly Row Home Renovation in Philadelphia
I am excited to share the before and after for a recently completed design project with you! We reworked nearly every area of the first floor of this family’s home, including some minor adjustments to the recently renovated kitchen. This extensive renovation lead to an incredible transformation for this family, entirely altering the way they experience their home. I’m sharing some behind the scenes on the design process as well as the crowd favorite:
Before and After shots!
Setting the scene:
A family’s graduate Hospital row home
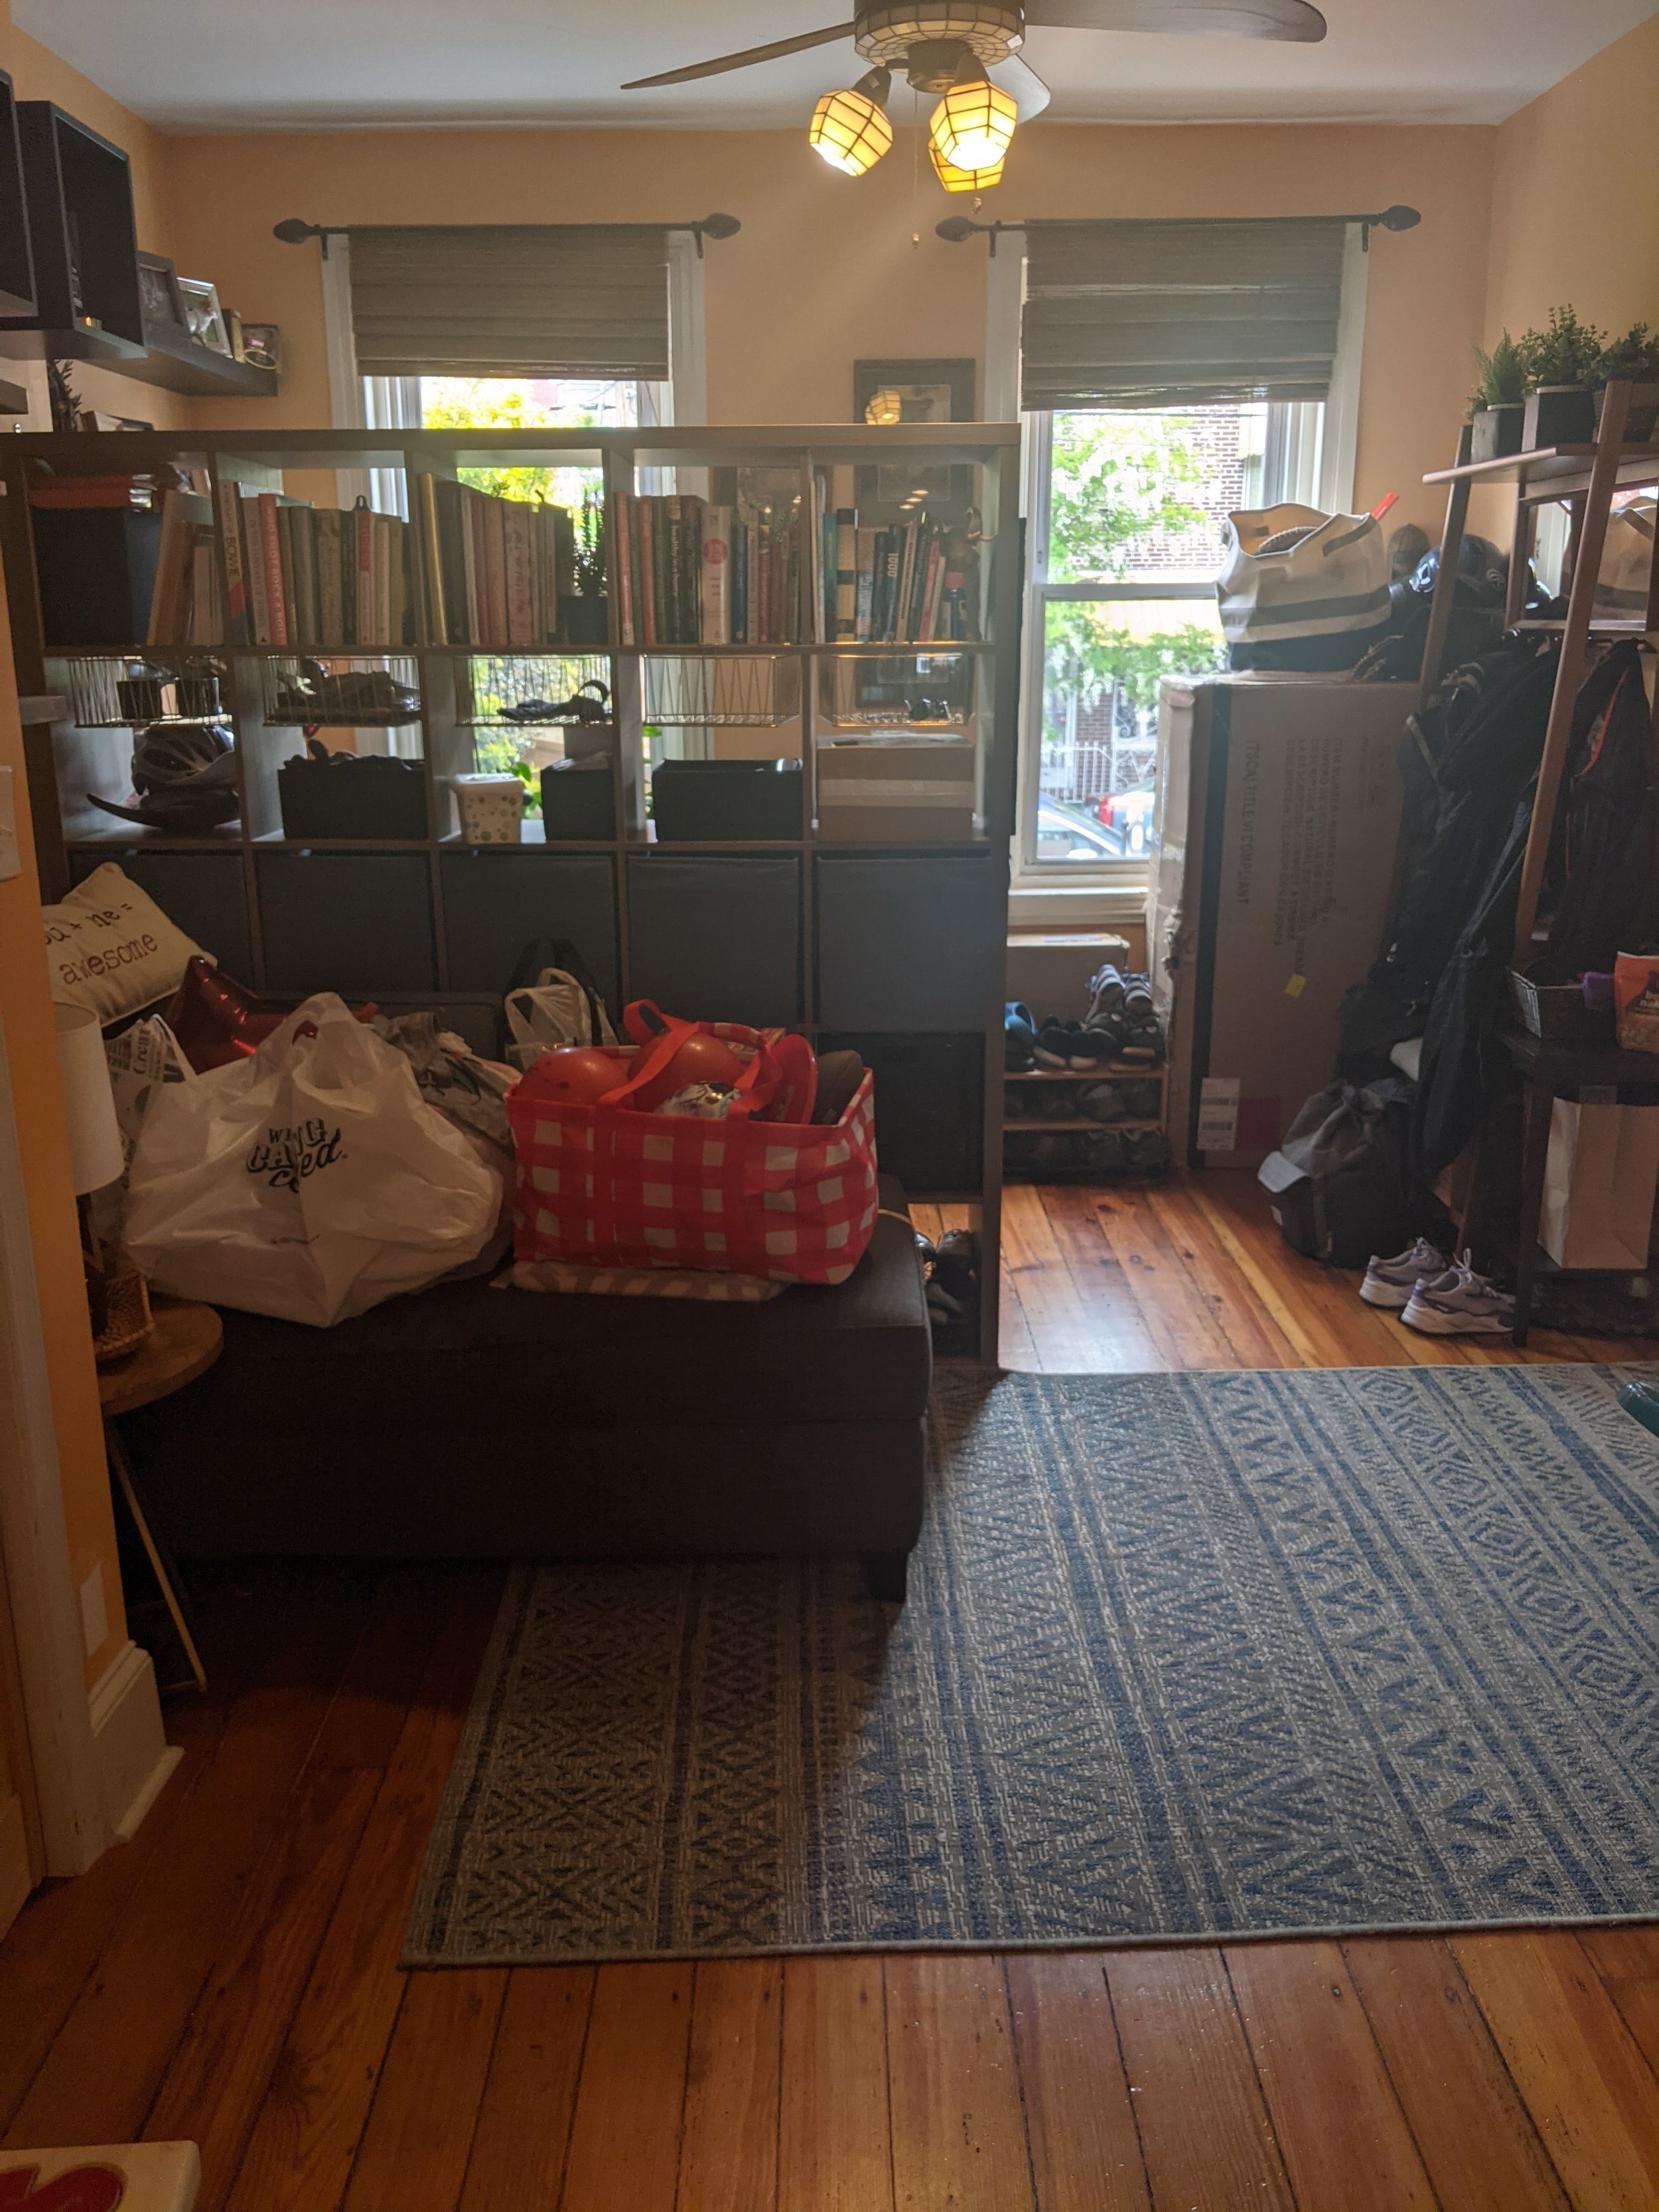
For this project, we renovated the first floor of a row home located in the Graduate Hospital area of Philadelphia for a young family of five.
Living in a city row home with children presents a lot of unique challenges. Aside from the school districts, there’s a reason why so many families move to the suburbs - mainly the finite space that you are working with in a city row home.
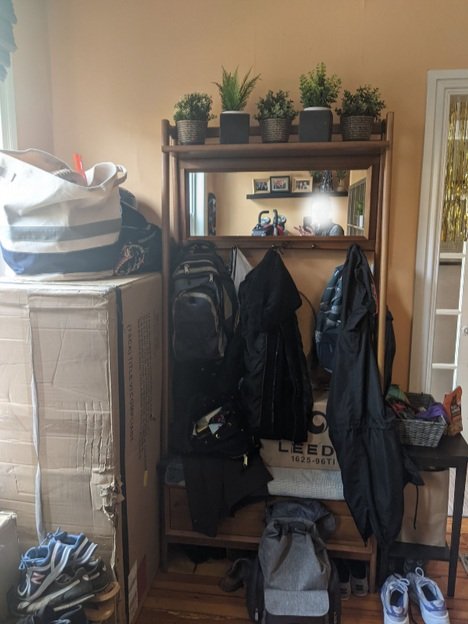
Most of these Philadelphia homes were built in late 1800’s or early 1900’s and the reality is that the original home layouts don’t support our “modern” lives. When it comes to city living with children, these homes desperately lack storage for all of the toys, gear, etc., which can be an overwhelming experience for parents, caregivers and visitors.
When we took on this project, these clients were overwhelmed by the state of their home and really needing an expert to help develop a new plan layout that would work for their daily lives. Beyond just identifying the best layout, they needed help sourcing durable furnishings and blending in their extensive (and amazing!!) art & accessory collection into the design so that it truly reflected them. They had a general understanding of what the needed and how they wanted the space to function, but they did not have the capacity to move forward without help from a professional.
That’s where I come in 😊
Designing for the Clients' Needs:
It starts with an Interior Design Consultation
Before I begin any project, we start with a consultation which allows us to identify the primary drivers for any project; this includes the top priorities, the “nice to haves,” and just as important, things we’d like to avoid for the project.
After our initial consultation for this project, the design priorities were very clear:
They needed a lot of storage and a multi-functional layout.
They wanted beautiful furnishings, but with three young boys, our selections would have to be durable.
They wanted to take into consideration future needs and not just design for their immediate needs.
They weren’t afraid of color, but wanted to do it in a way that truly reflected their personal style.
They wanted to keep all the spaces feeling bright. Row homes tend to have limited natural light given their layouts. Any modifications we made needed to keep the entire first level feeling light.
Renovations can be notoriously wasteful, they wanted to take a more eco-friendly approach to the design and execution wherever possible
With our priorities for the new space clearly established (Beauty, Durability, Storage, Multi-functional and Eco-Friendly) we got to work!
Before & After:
Everyone’s favorite part of any Design Project
I start the design of every project focusing on two primary elements: the style and the layout.
Together with the client we pour over lots of inspiration images to hone in on the sense of style and the overall design “vision” for the space.
Next we’ll prepare several layout configurations to identify which meets the most priorities for the project. This helps set the framework for all other design and selections to come.
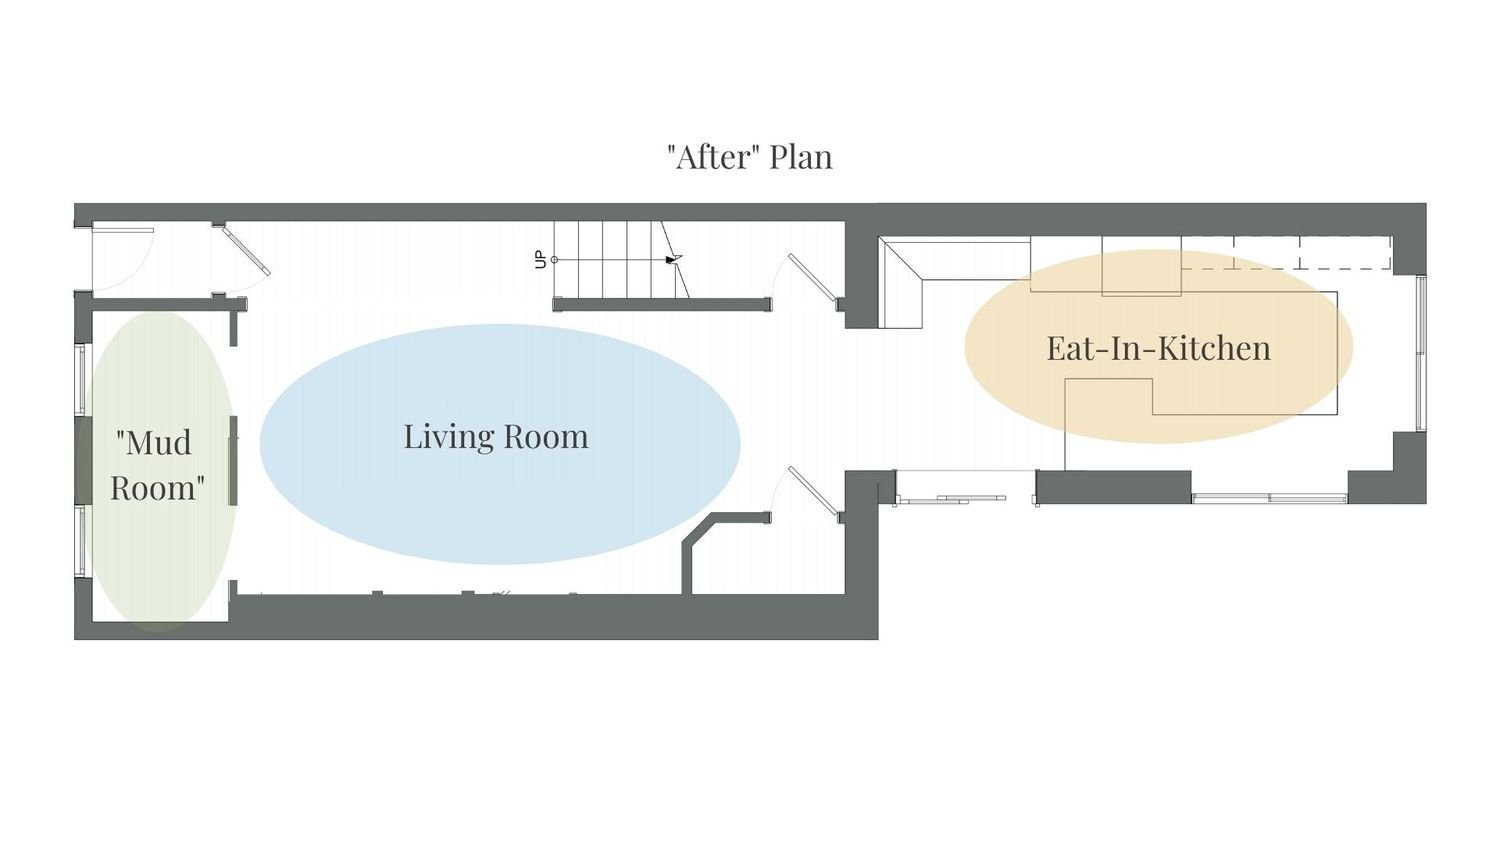
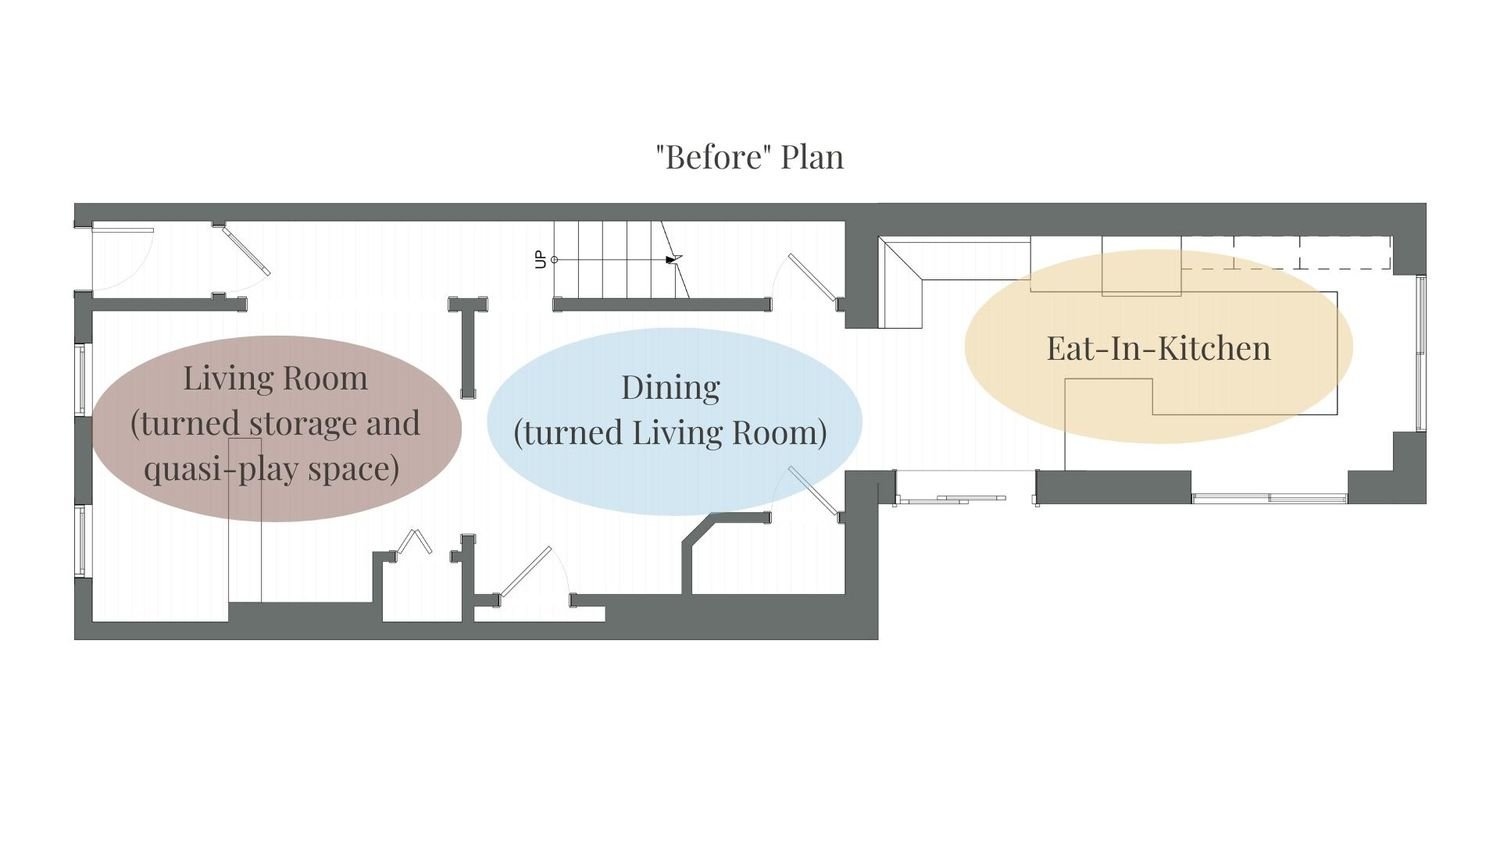
Early on in the design process we came to the decision that the plan below was the best way to achieve their primary goals for the project!
Use the slider below to compare the original plan with the new plan:
With a clear design direction and an established layout, we start to select preliminary furnishings, flush out the details of the design more thoroughly, and prepare deliverables in order to bring the project to life.
The result of this streamlined design process is the beautiful before and after photos pictured:

Eco-friendly Home Design:
Strategic Choices add up for a Big Impact
Most clients that I work with either request or are open to eco-friendly recommendations & selections throughout the process. There are many different ways we can take a green interior design approach to a project, but for this family our strategy looked like this:
Selecting primarily American Made goods and custom furnishings made locally.
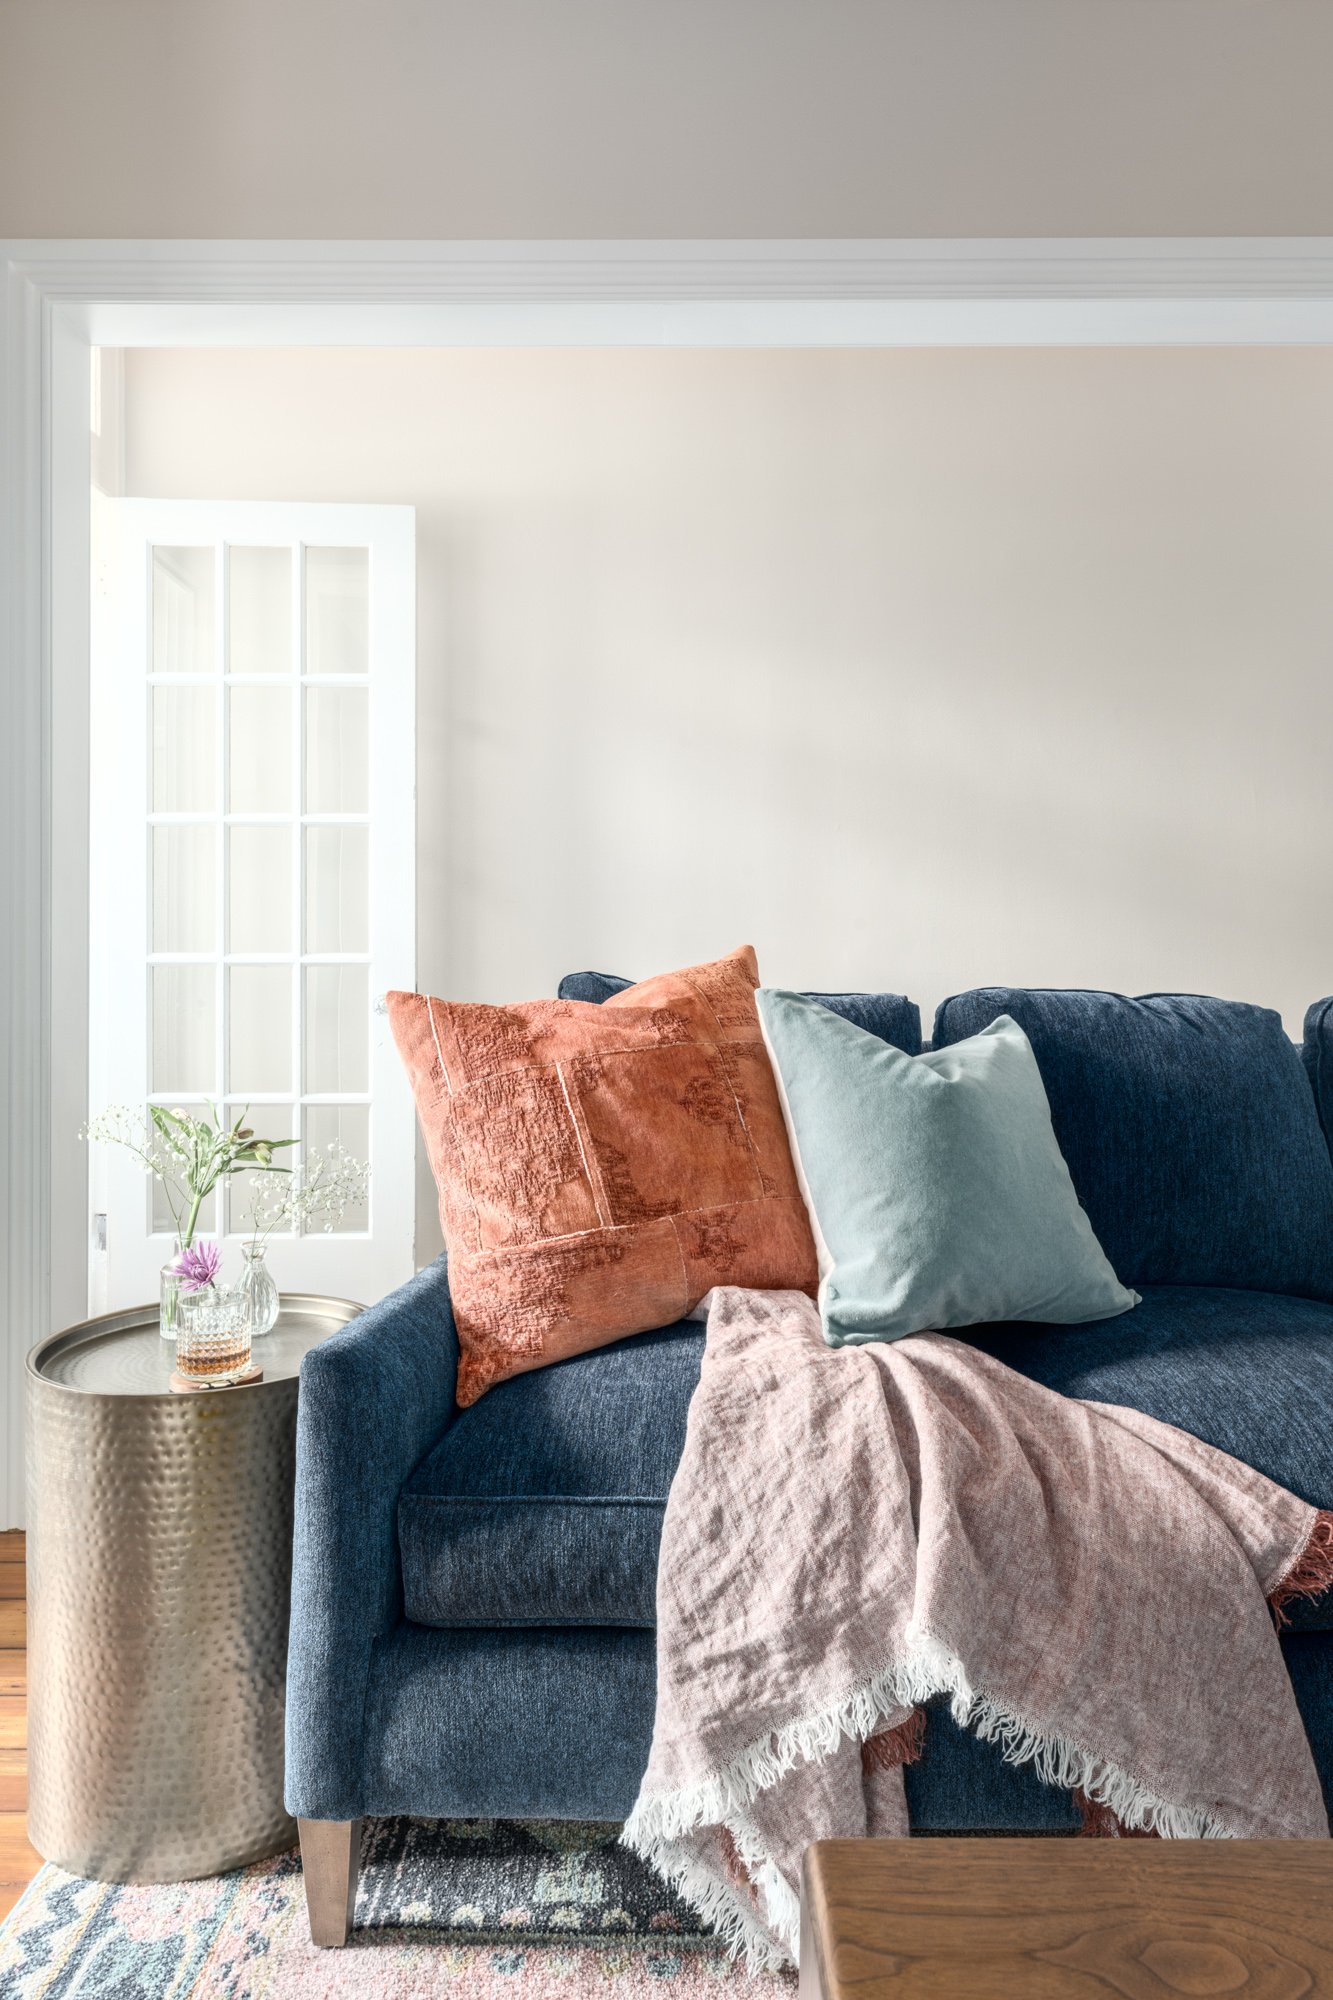
Prioritizing selections that were ultra-durable, such as performance fabrics & easy to maintain rugs. We went this route in order to keep these items looking beautiful for a long time. We did not want to select low quality furnishings that could not stand up to the daily use of 3 young boys and ultimately end up in a landfill soon after.
We used Non-toxic paints on the cabinetry and Sherwin Williams “Air purifying” paint on the walls, which is an incredible product that actually breaks down any toxins that come from any other furnishings or materials in the home that might be “off-gassing.”
Lastly, we prioritized patching & refinishing the existing hardwood floors, despite the fact that it would not be a seamless look throughout. Keeping this material in the project meant we weren’t adding extra waste to landfills and also didn’t need to replace with a cheaper, less sustainable alternative.
By incorporating these strategies, we were able to make better selections for this family and the environment. I love that these eco-friendly design principles are relatively straightforward and that with the right knowledge and resources, these incremental choices create less waste and are more mindful of the environmental impact.
Transformative Results:
Designed for Daily Living
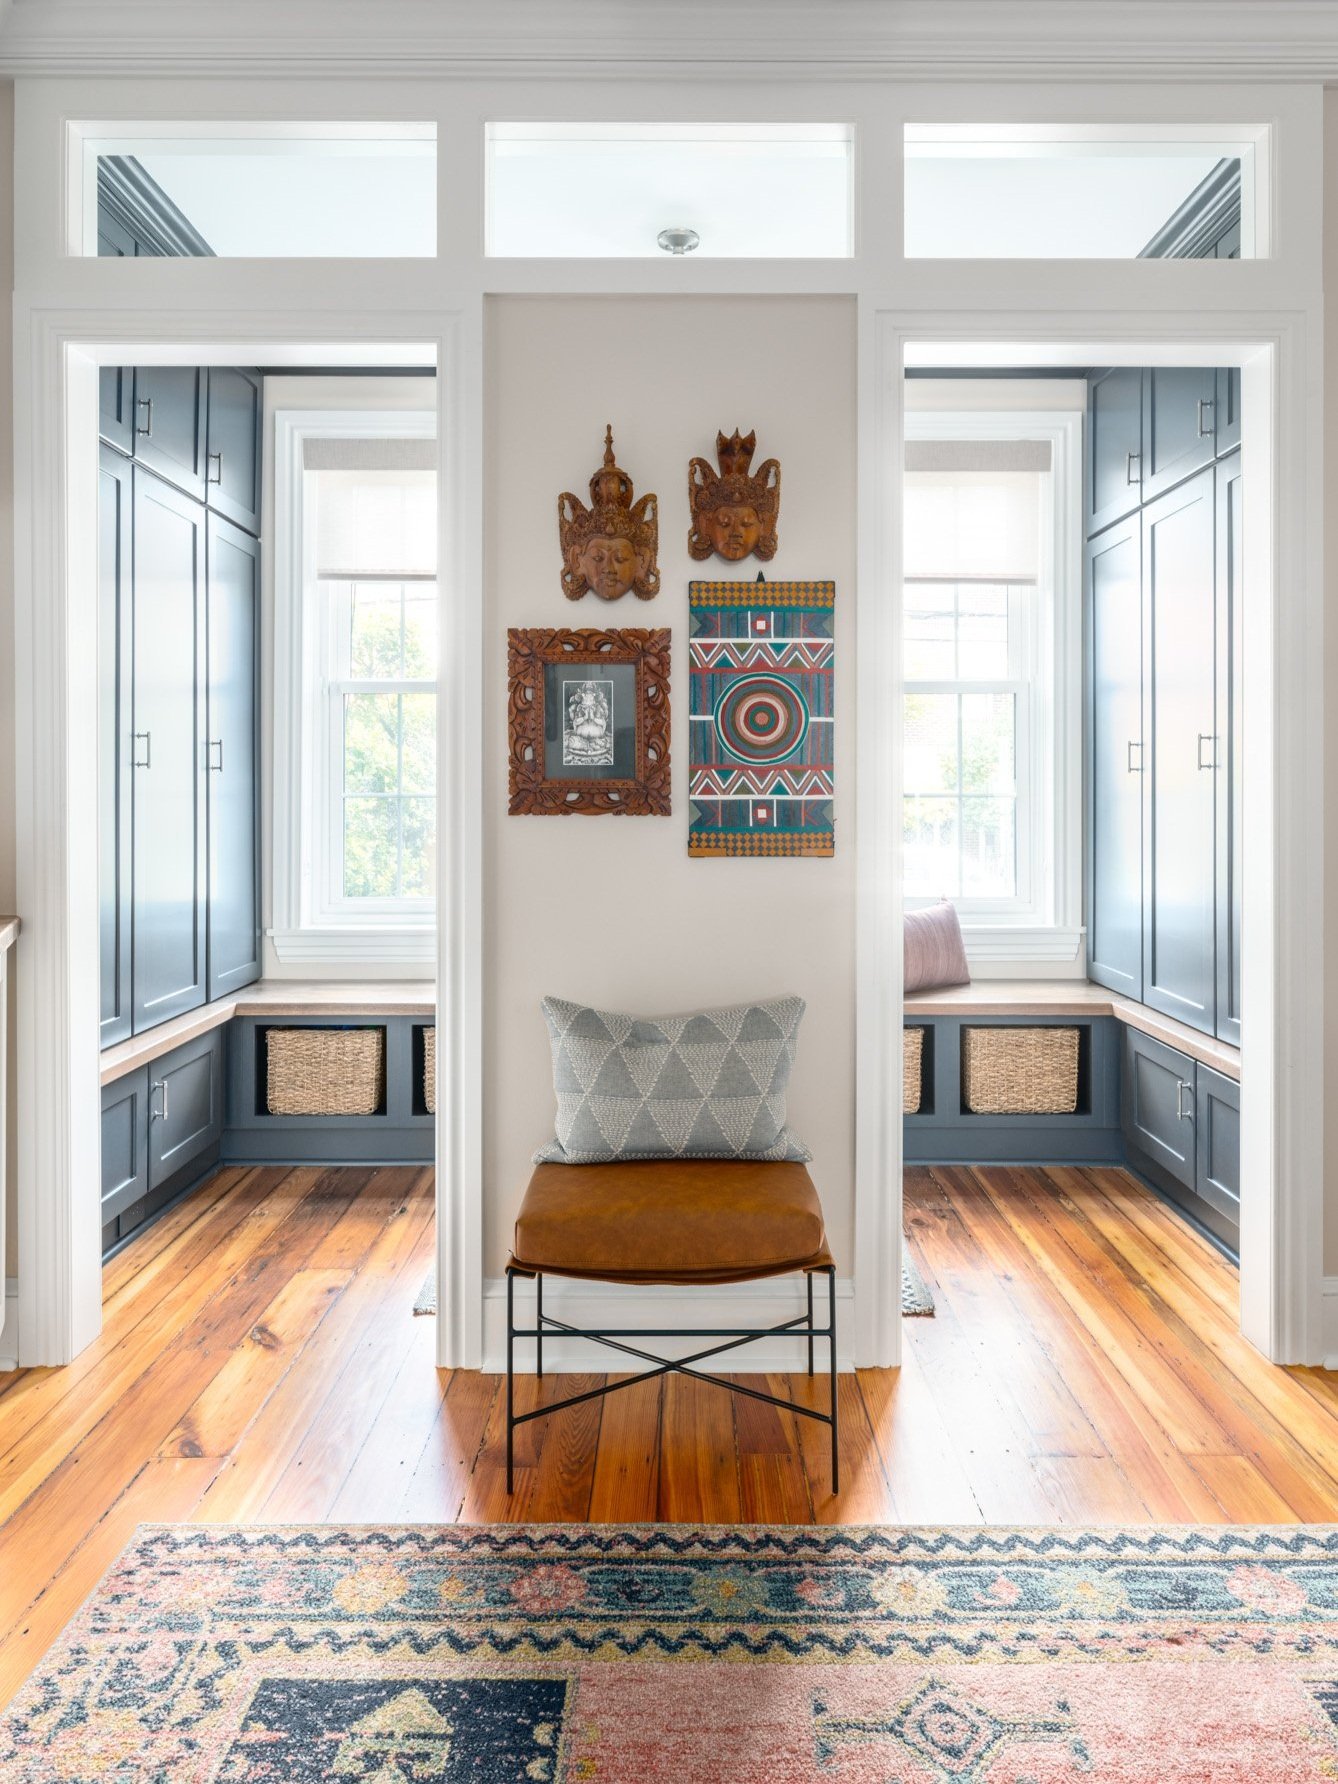
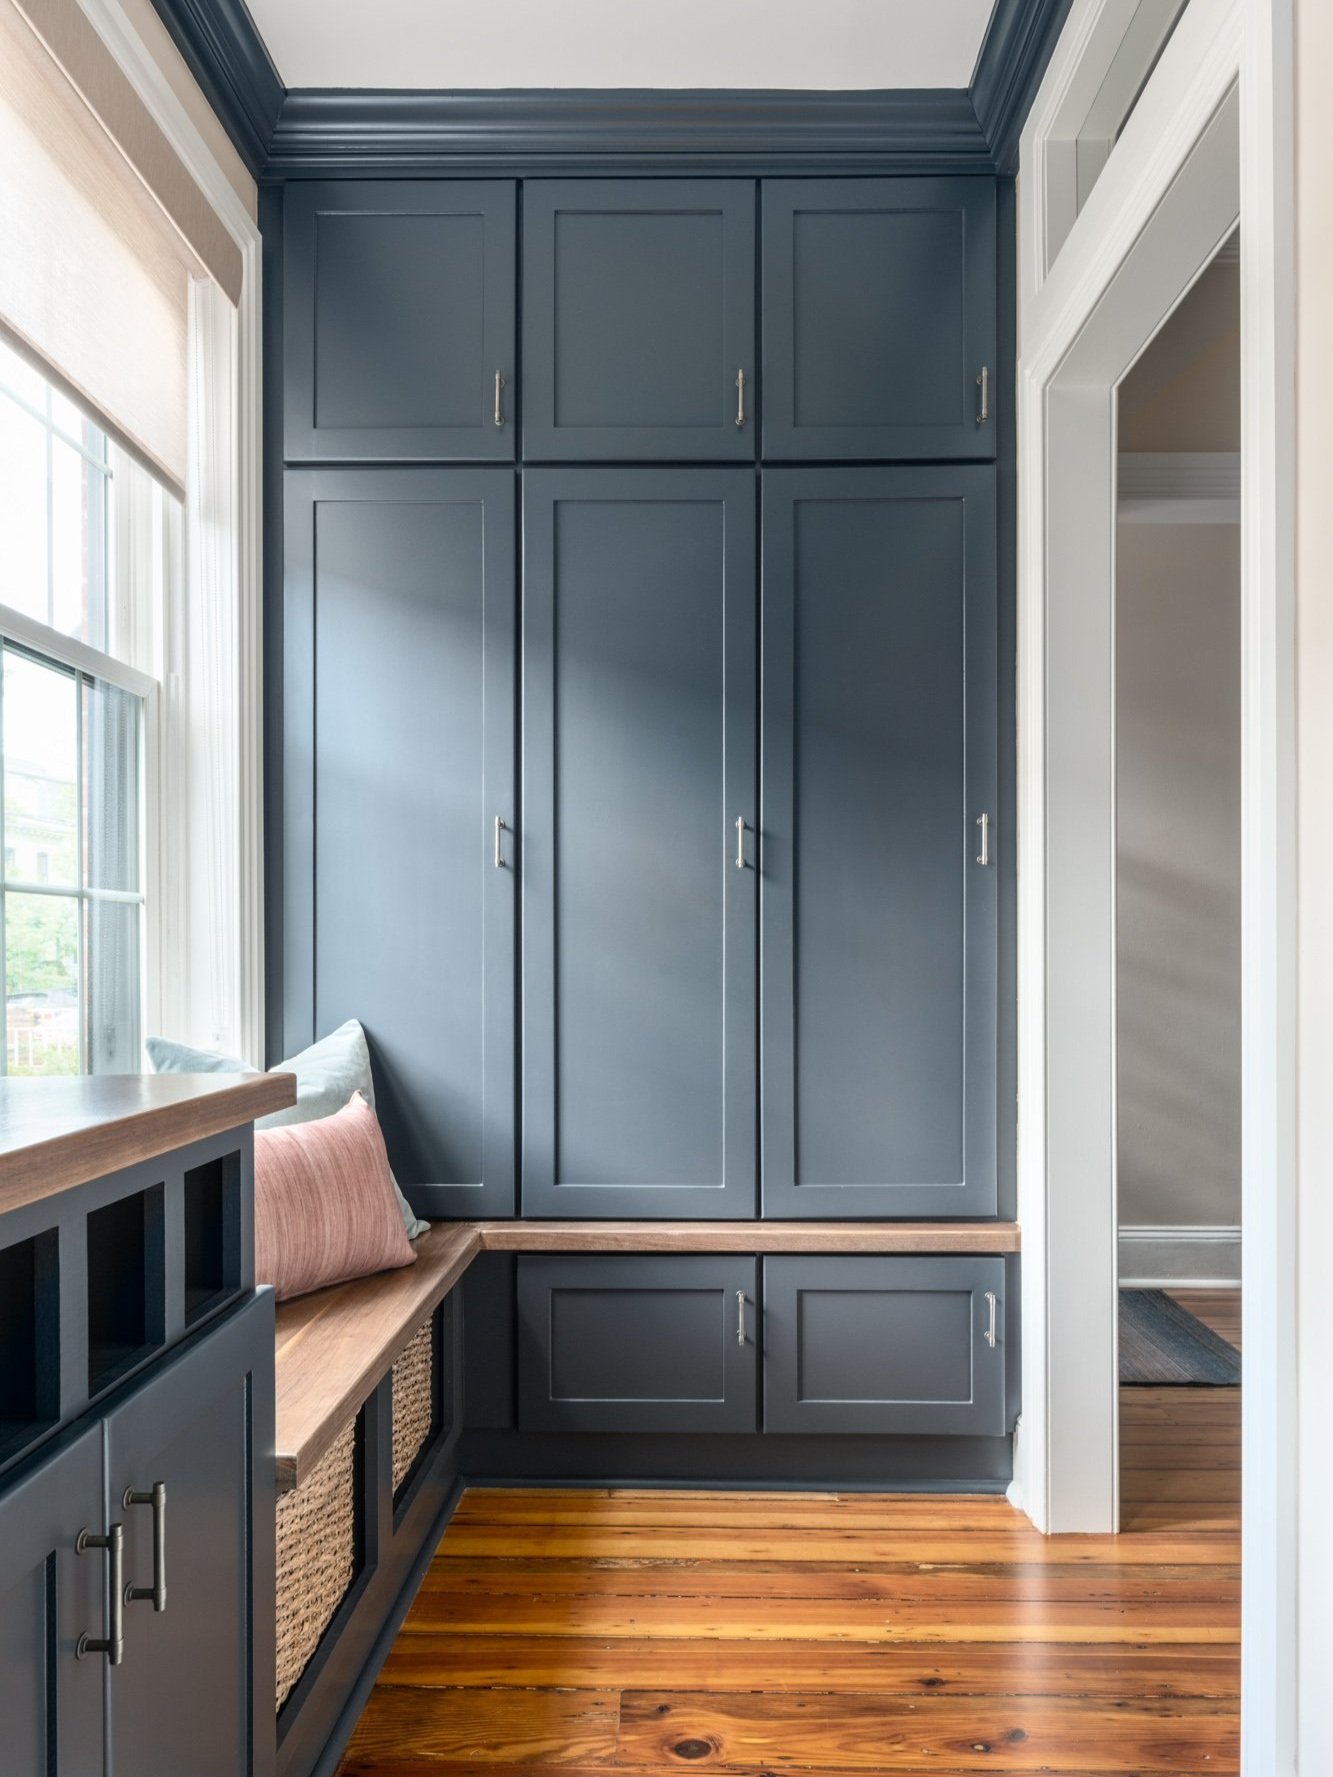
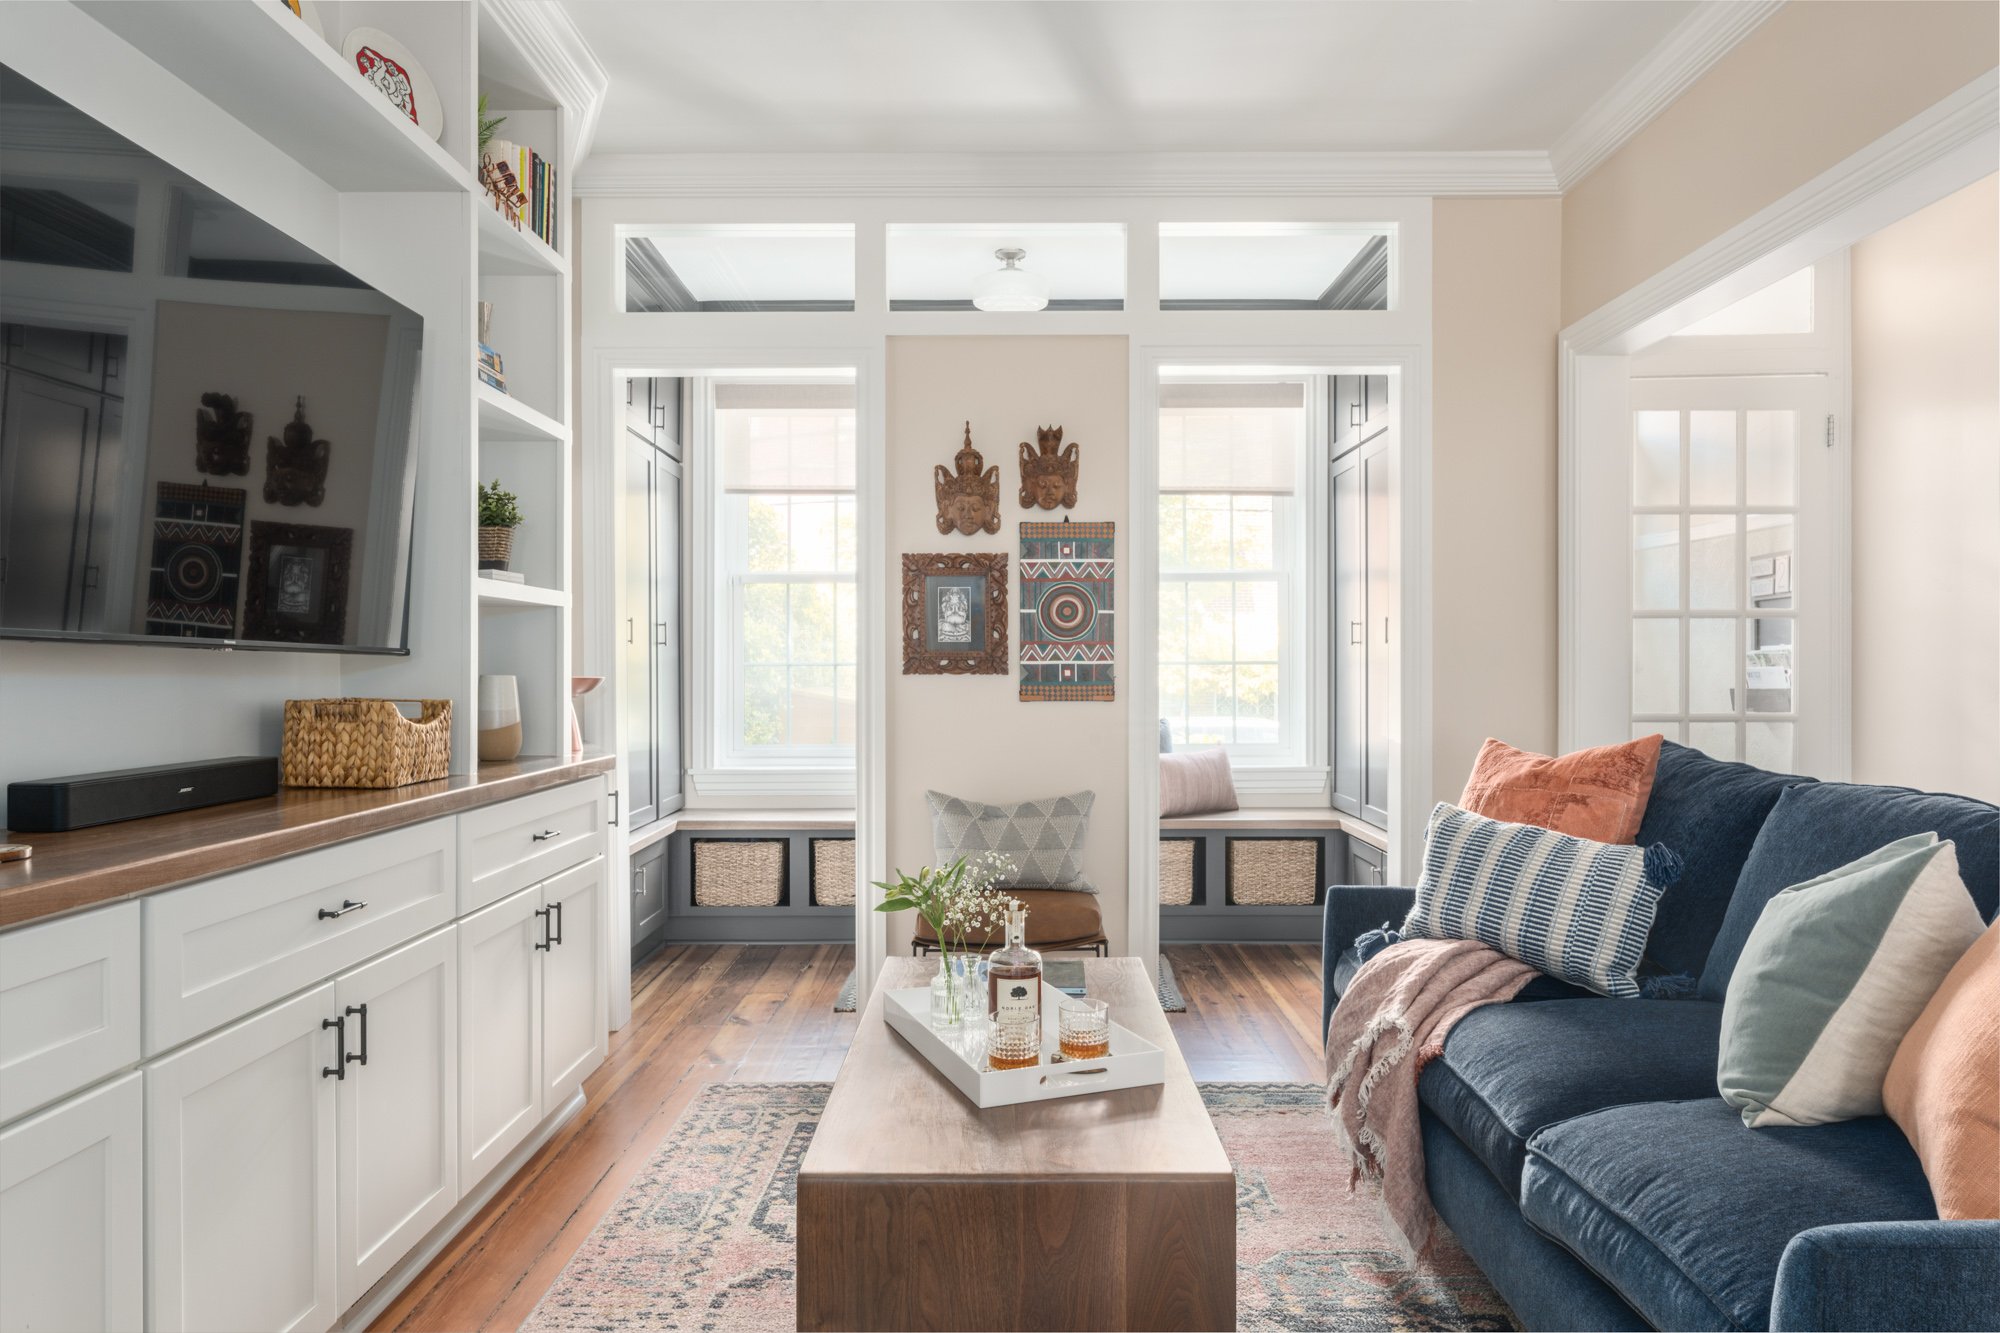
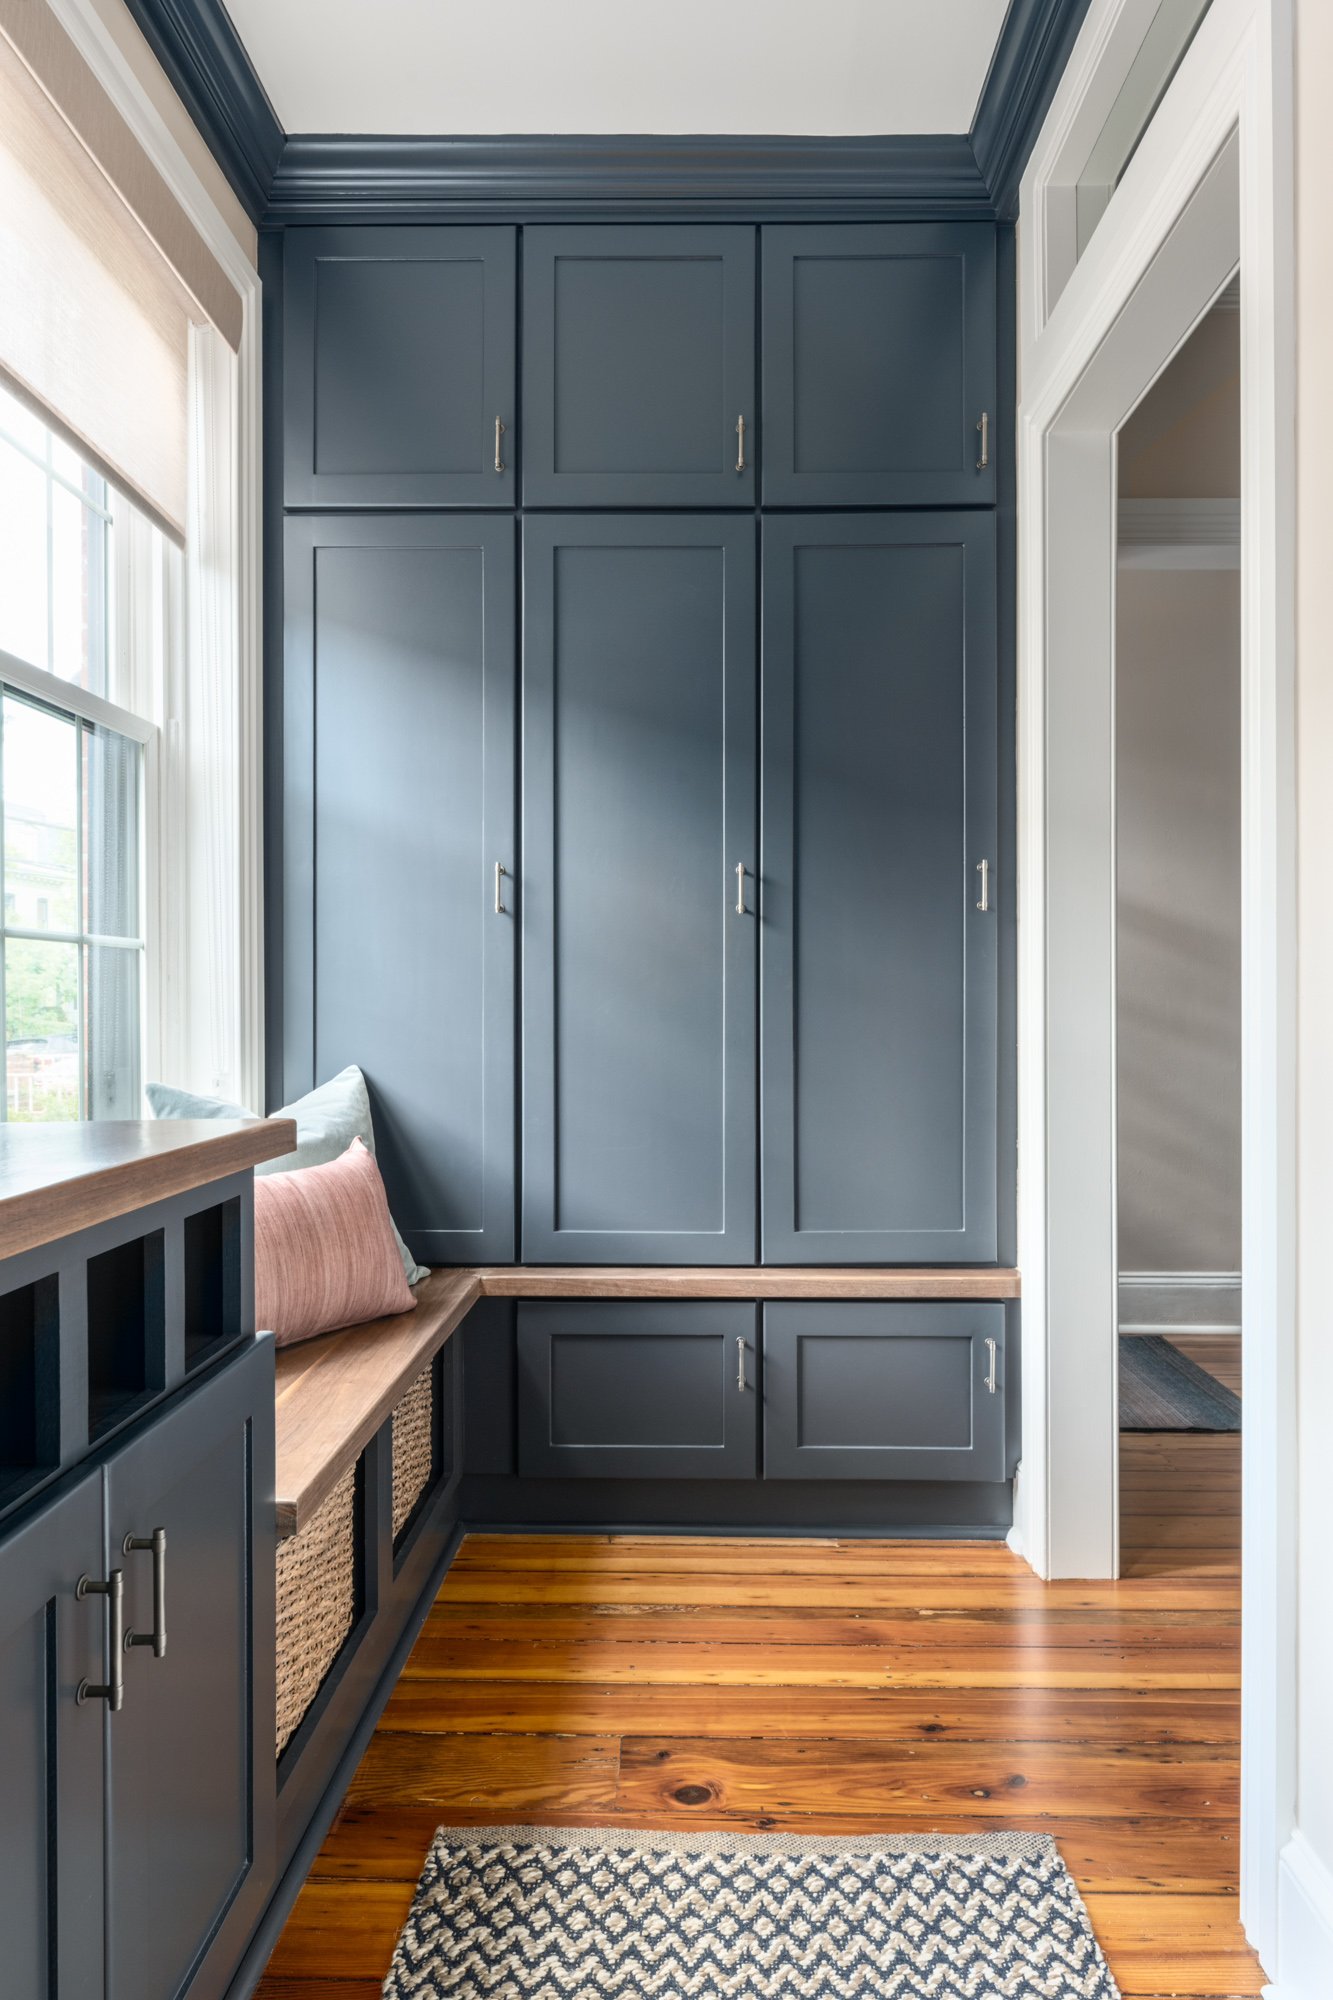
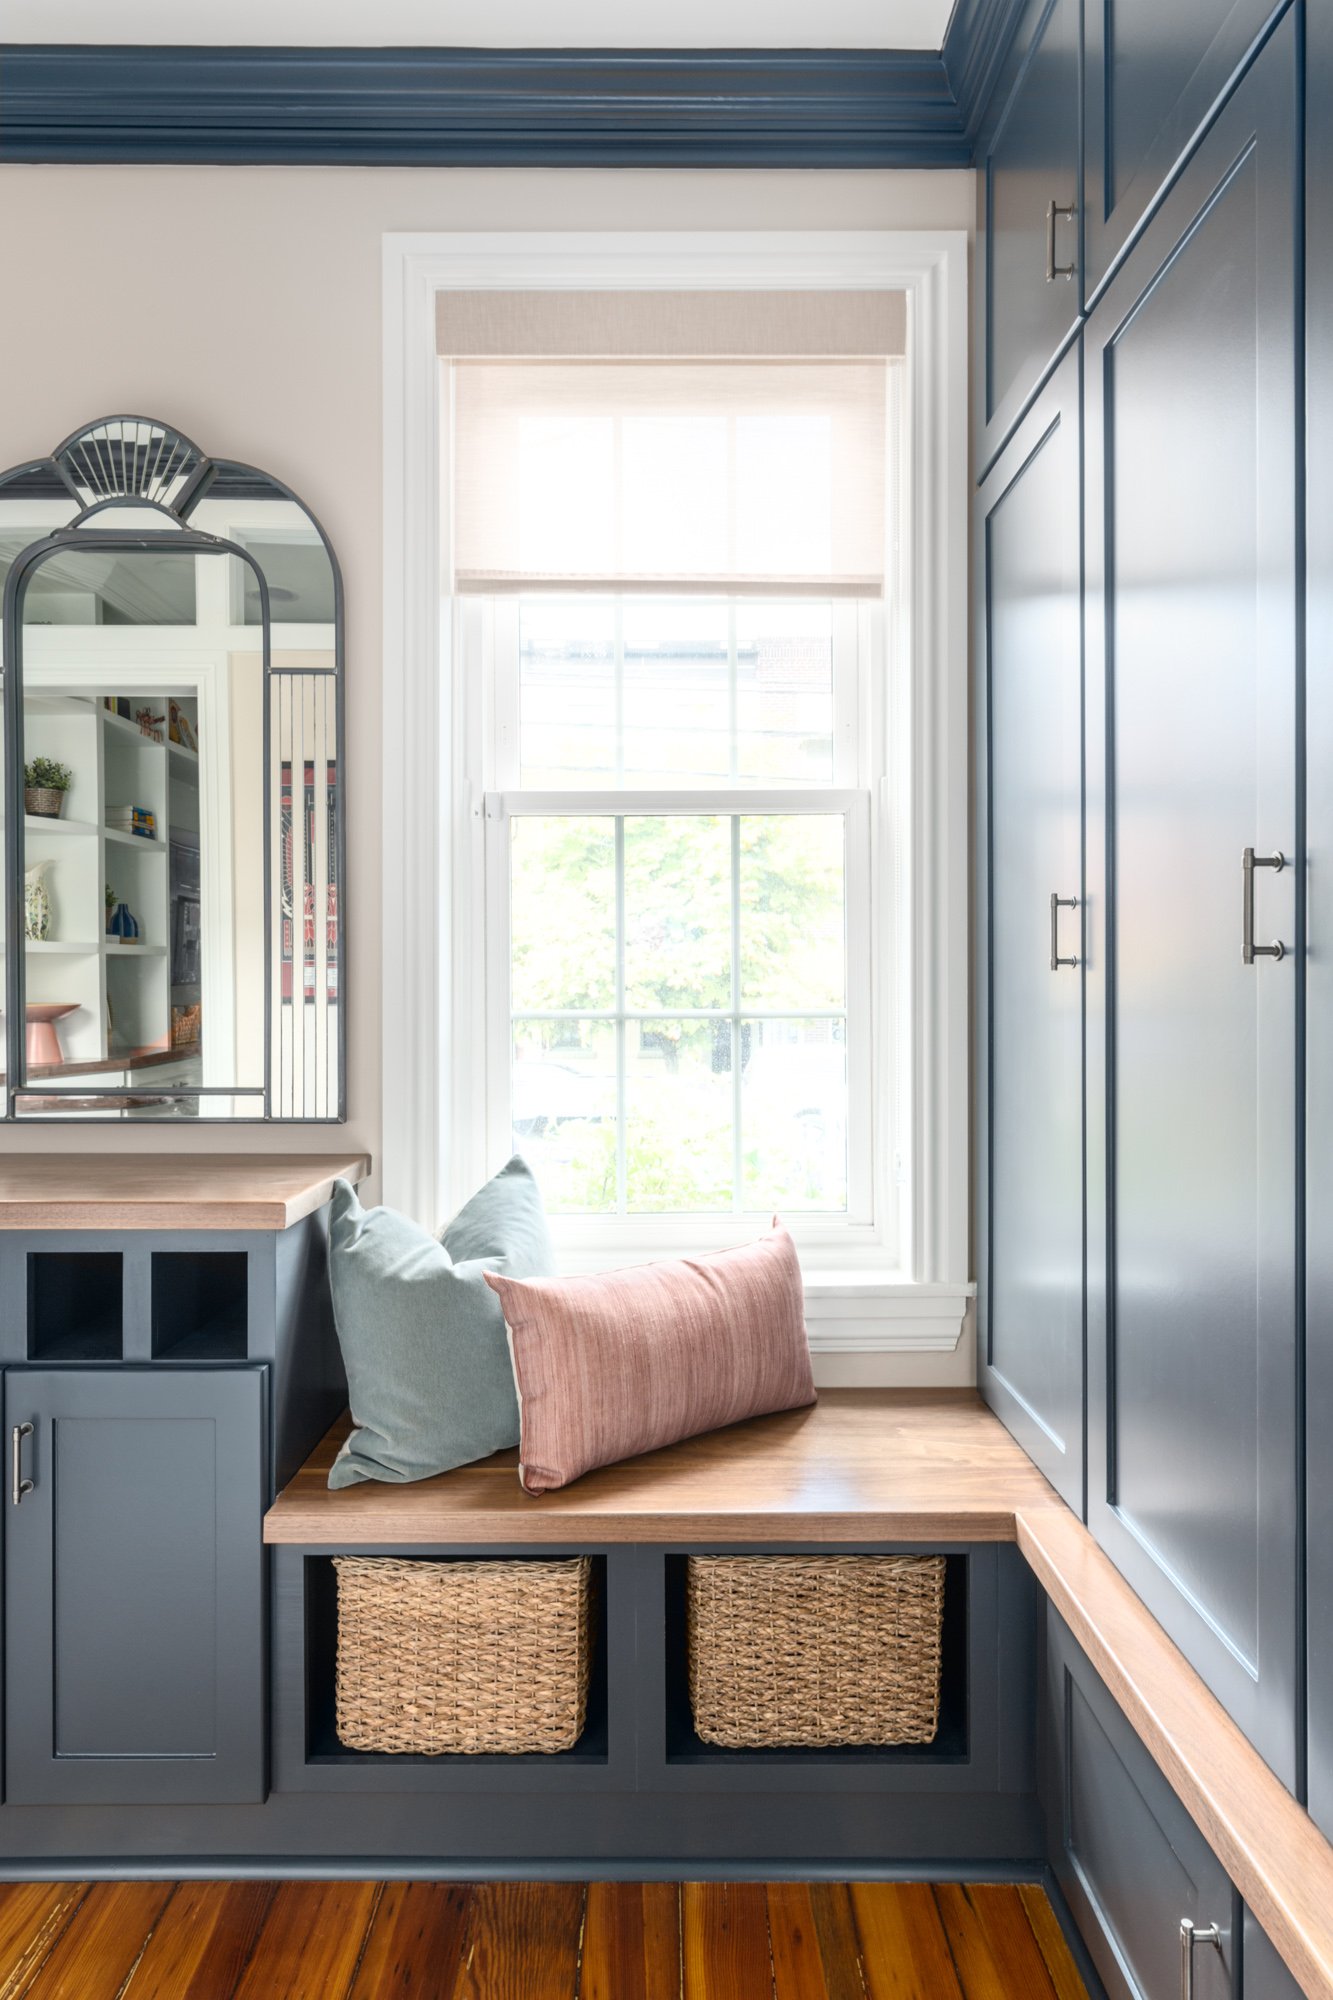
Keeping in mind our clients goals for the project, when we pulled the “mud room” to the front of the house, we added two openings and 3 transom windows to allow as much light from the windows to flow into the middle of the row home. The two openings also helped with flow rather than creating a dead-end space that given how narrow it was, would likely get clogged up when entering or leaving the house. We packed the mudroom with tons of concealed, functional storage for all the family’s coats, bags, shoes, etc.

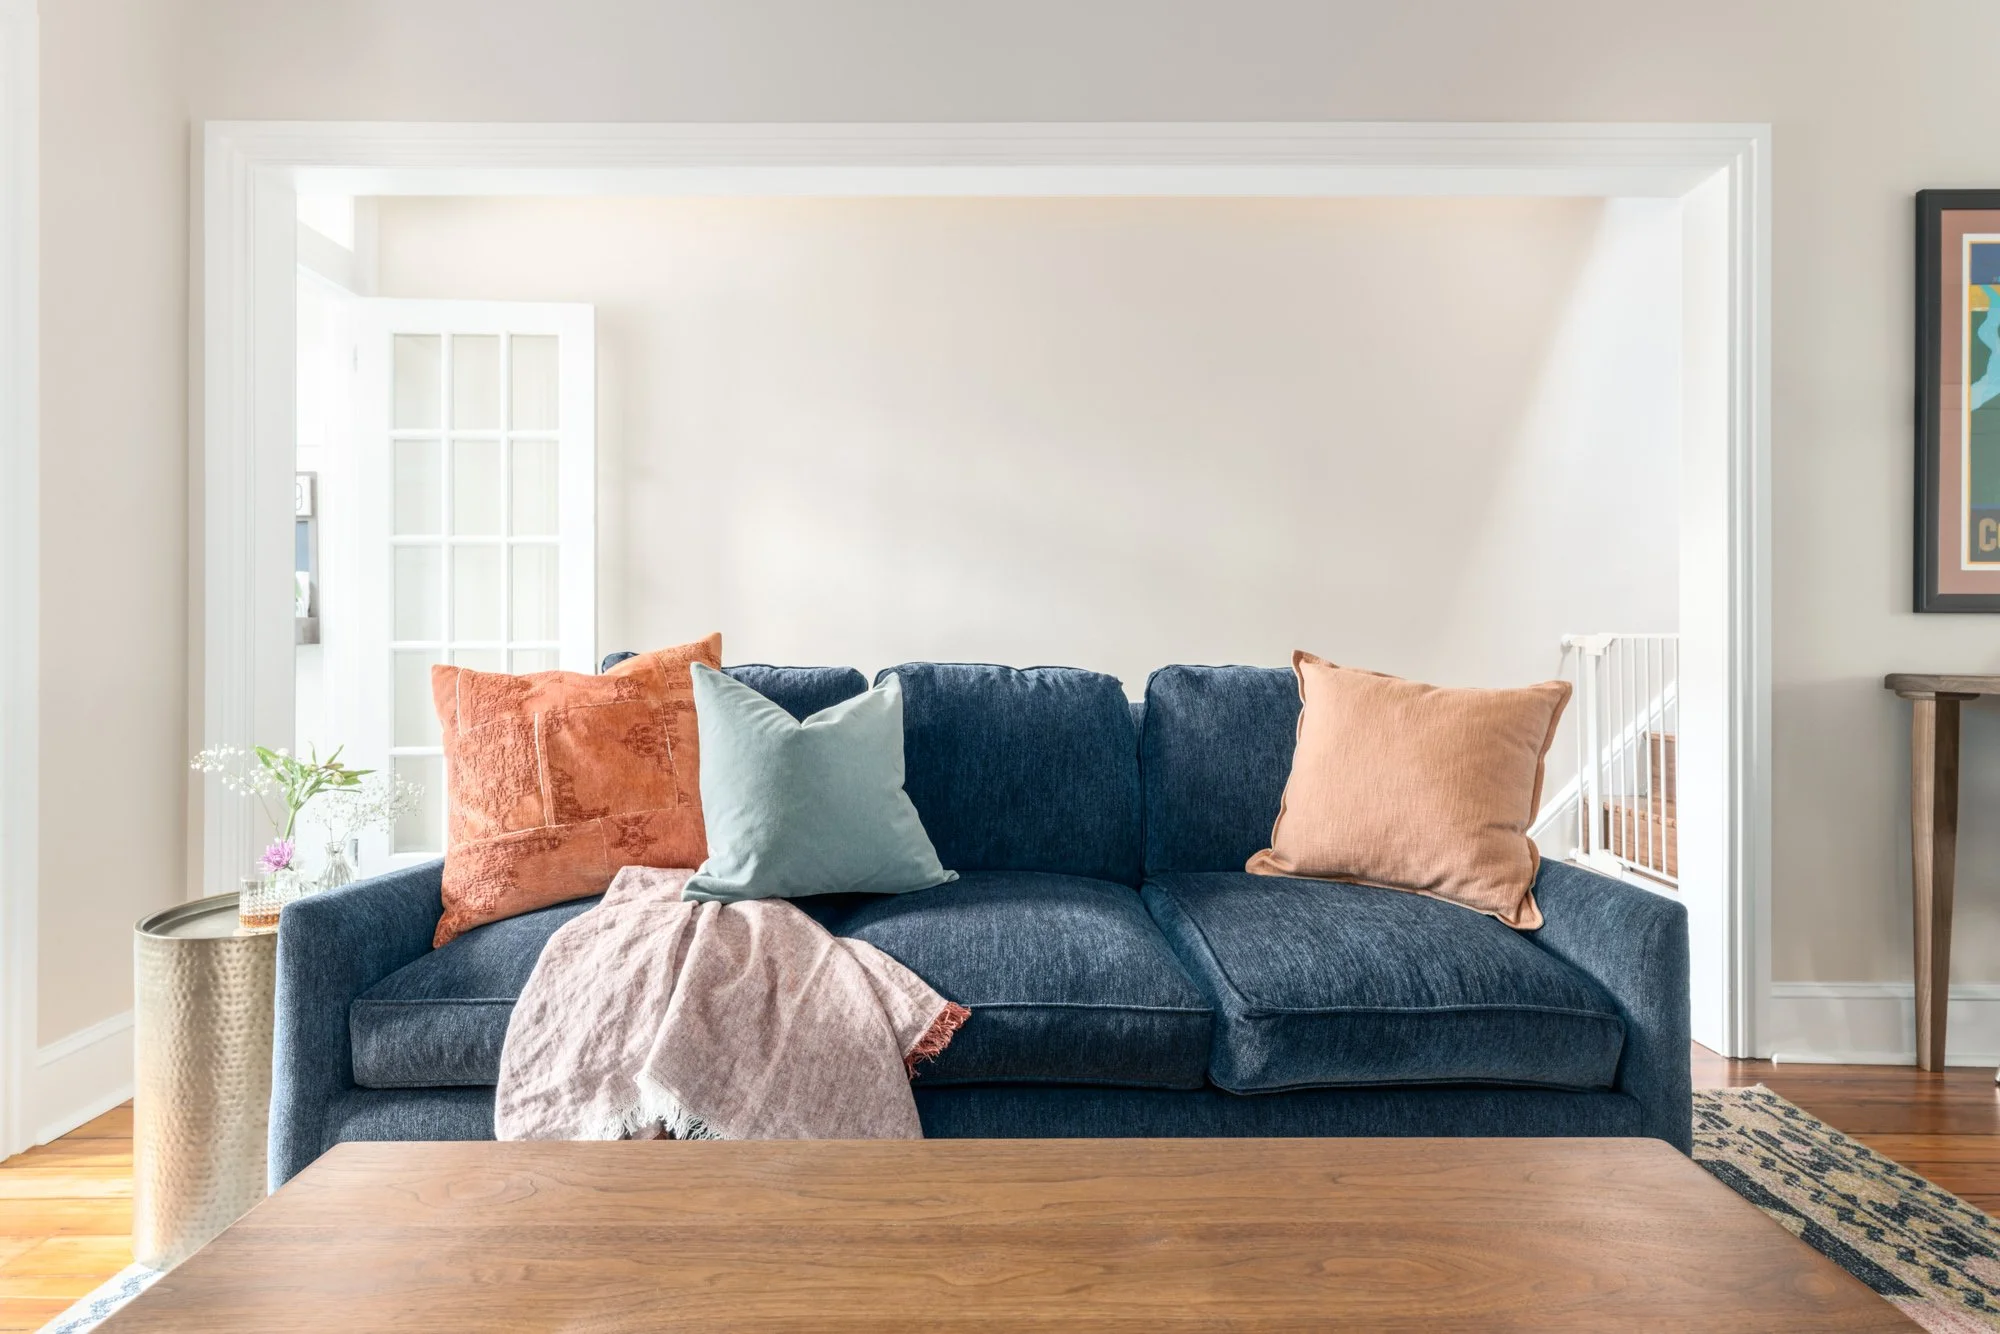
This mud room move, in addition to demolishing the wall that divided the original living room from dining room, also gave us a large spacious living room. One that is large enough for this family of five and their guests.
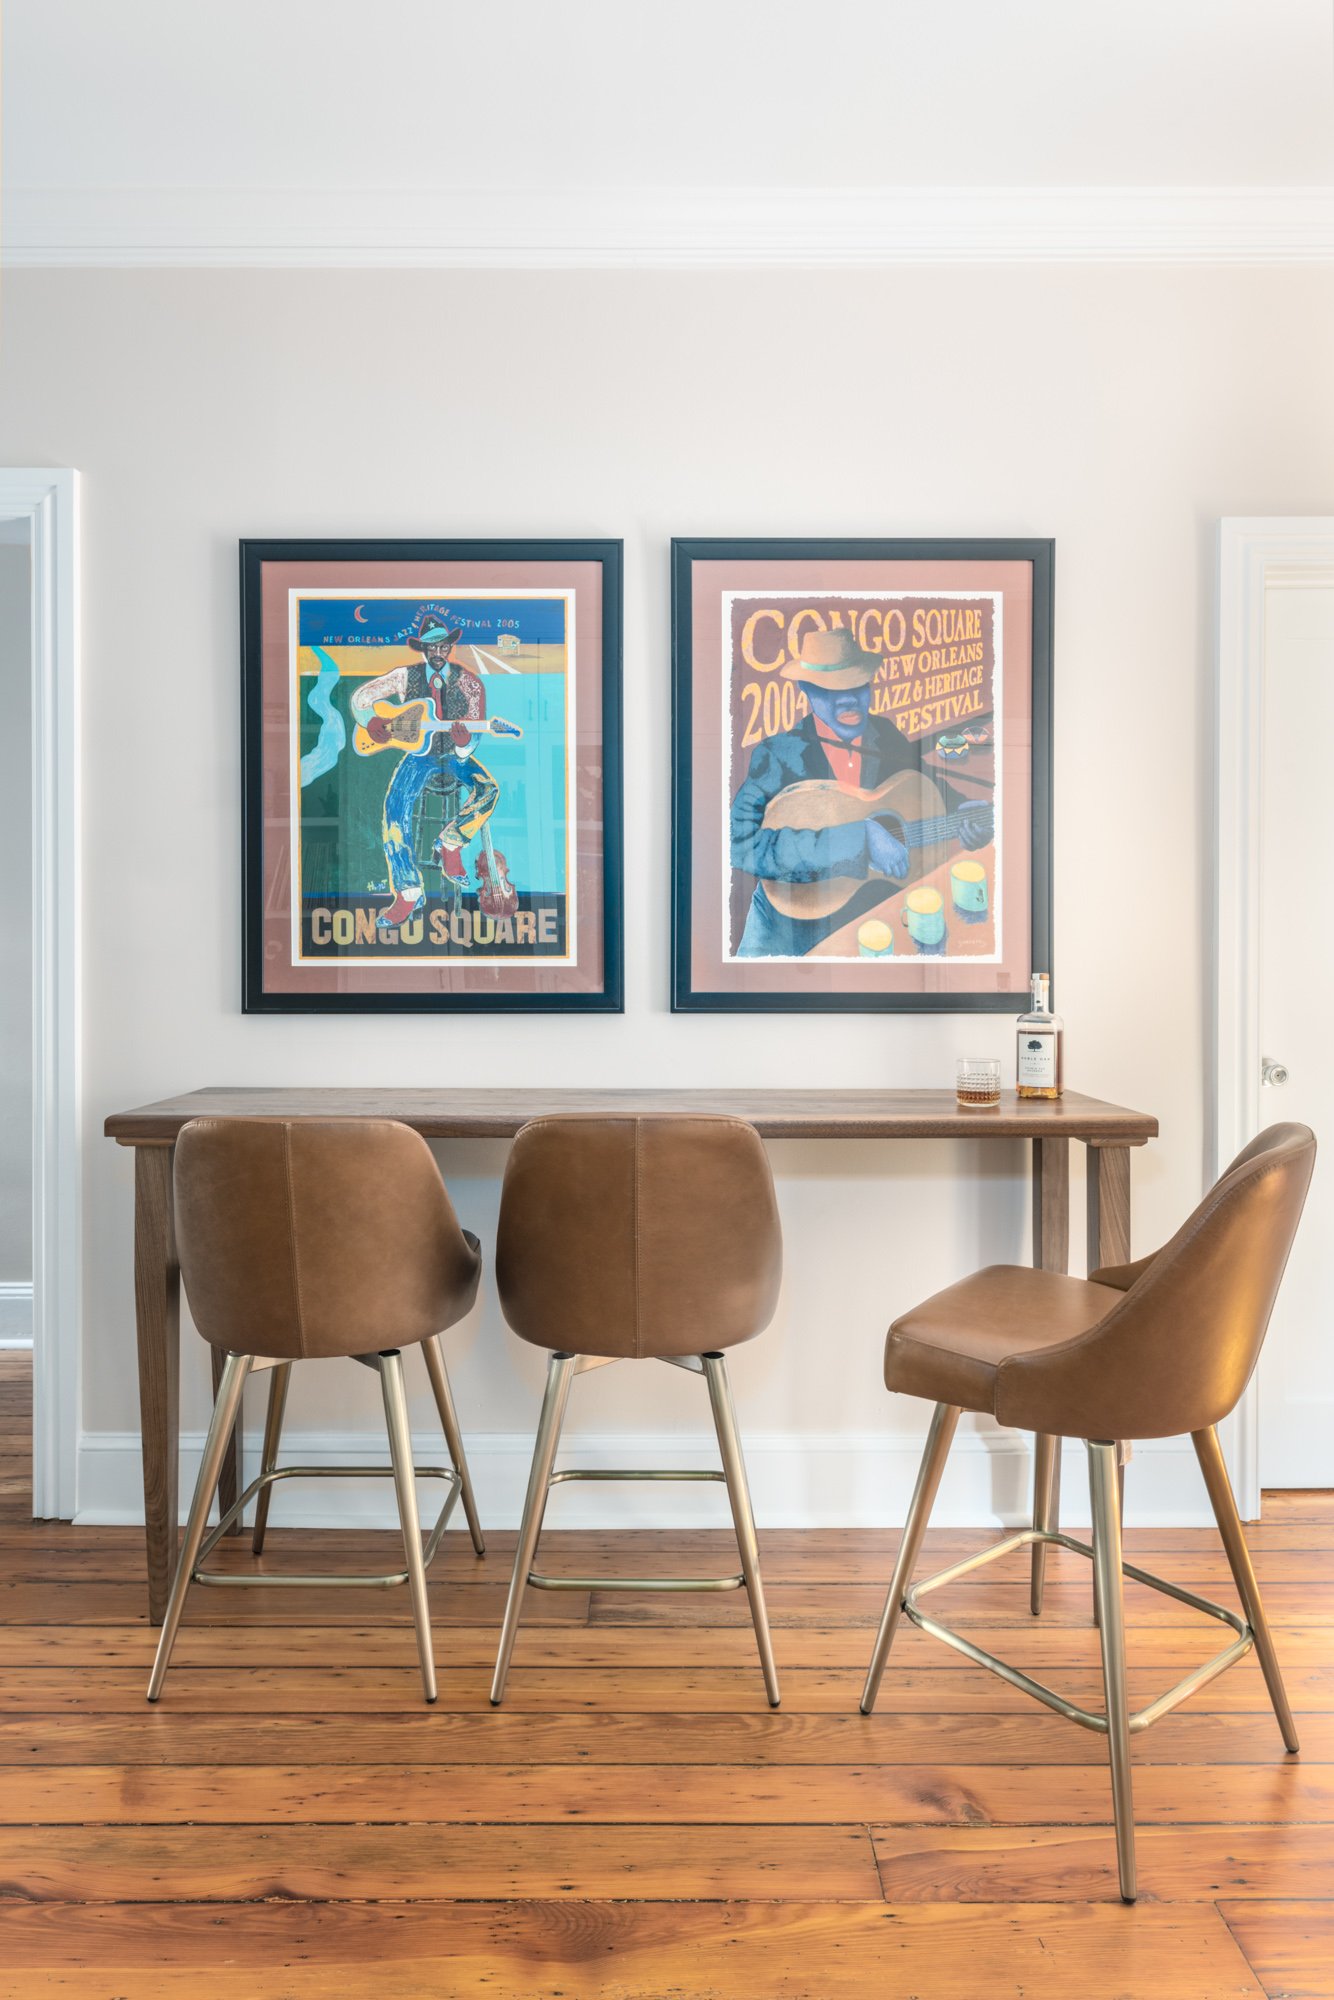
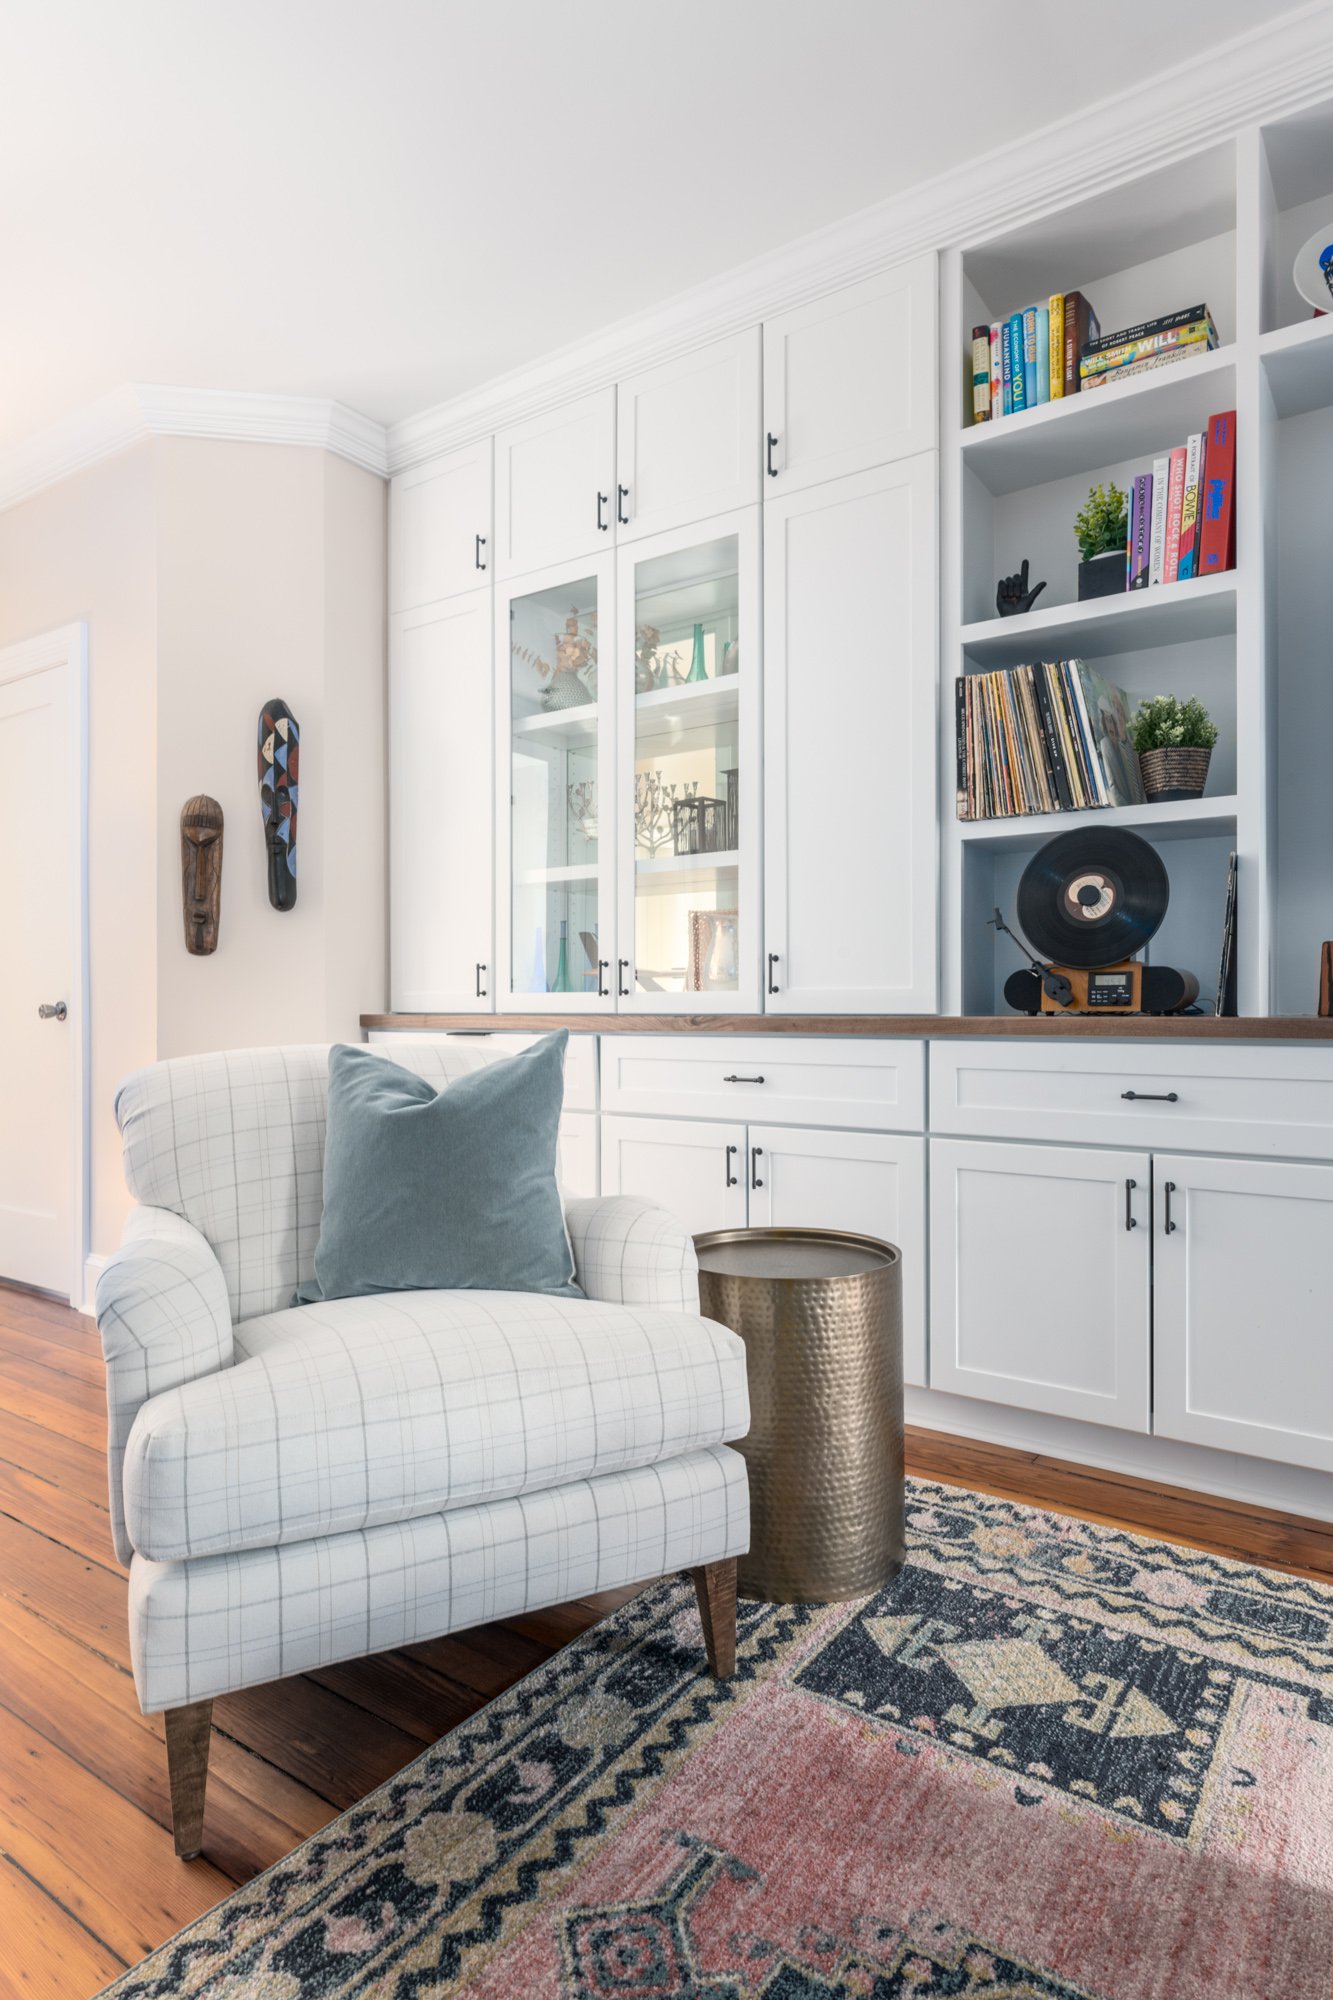
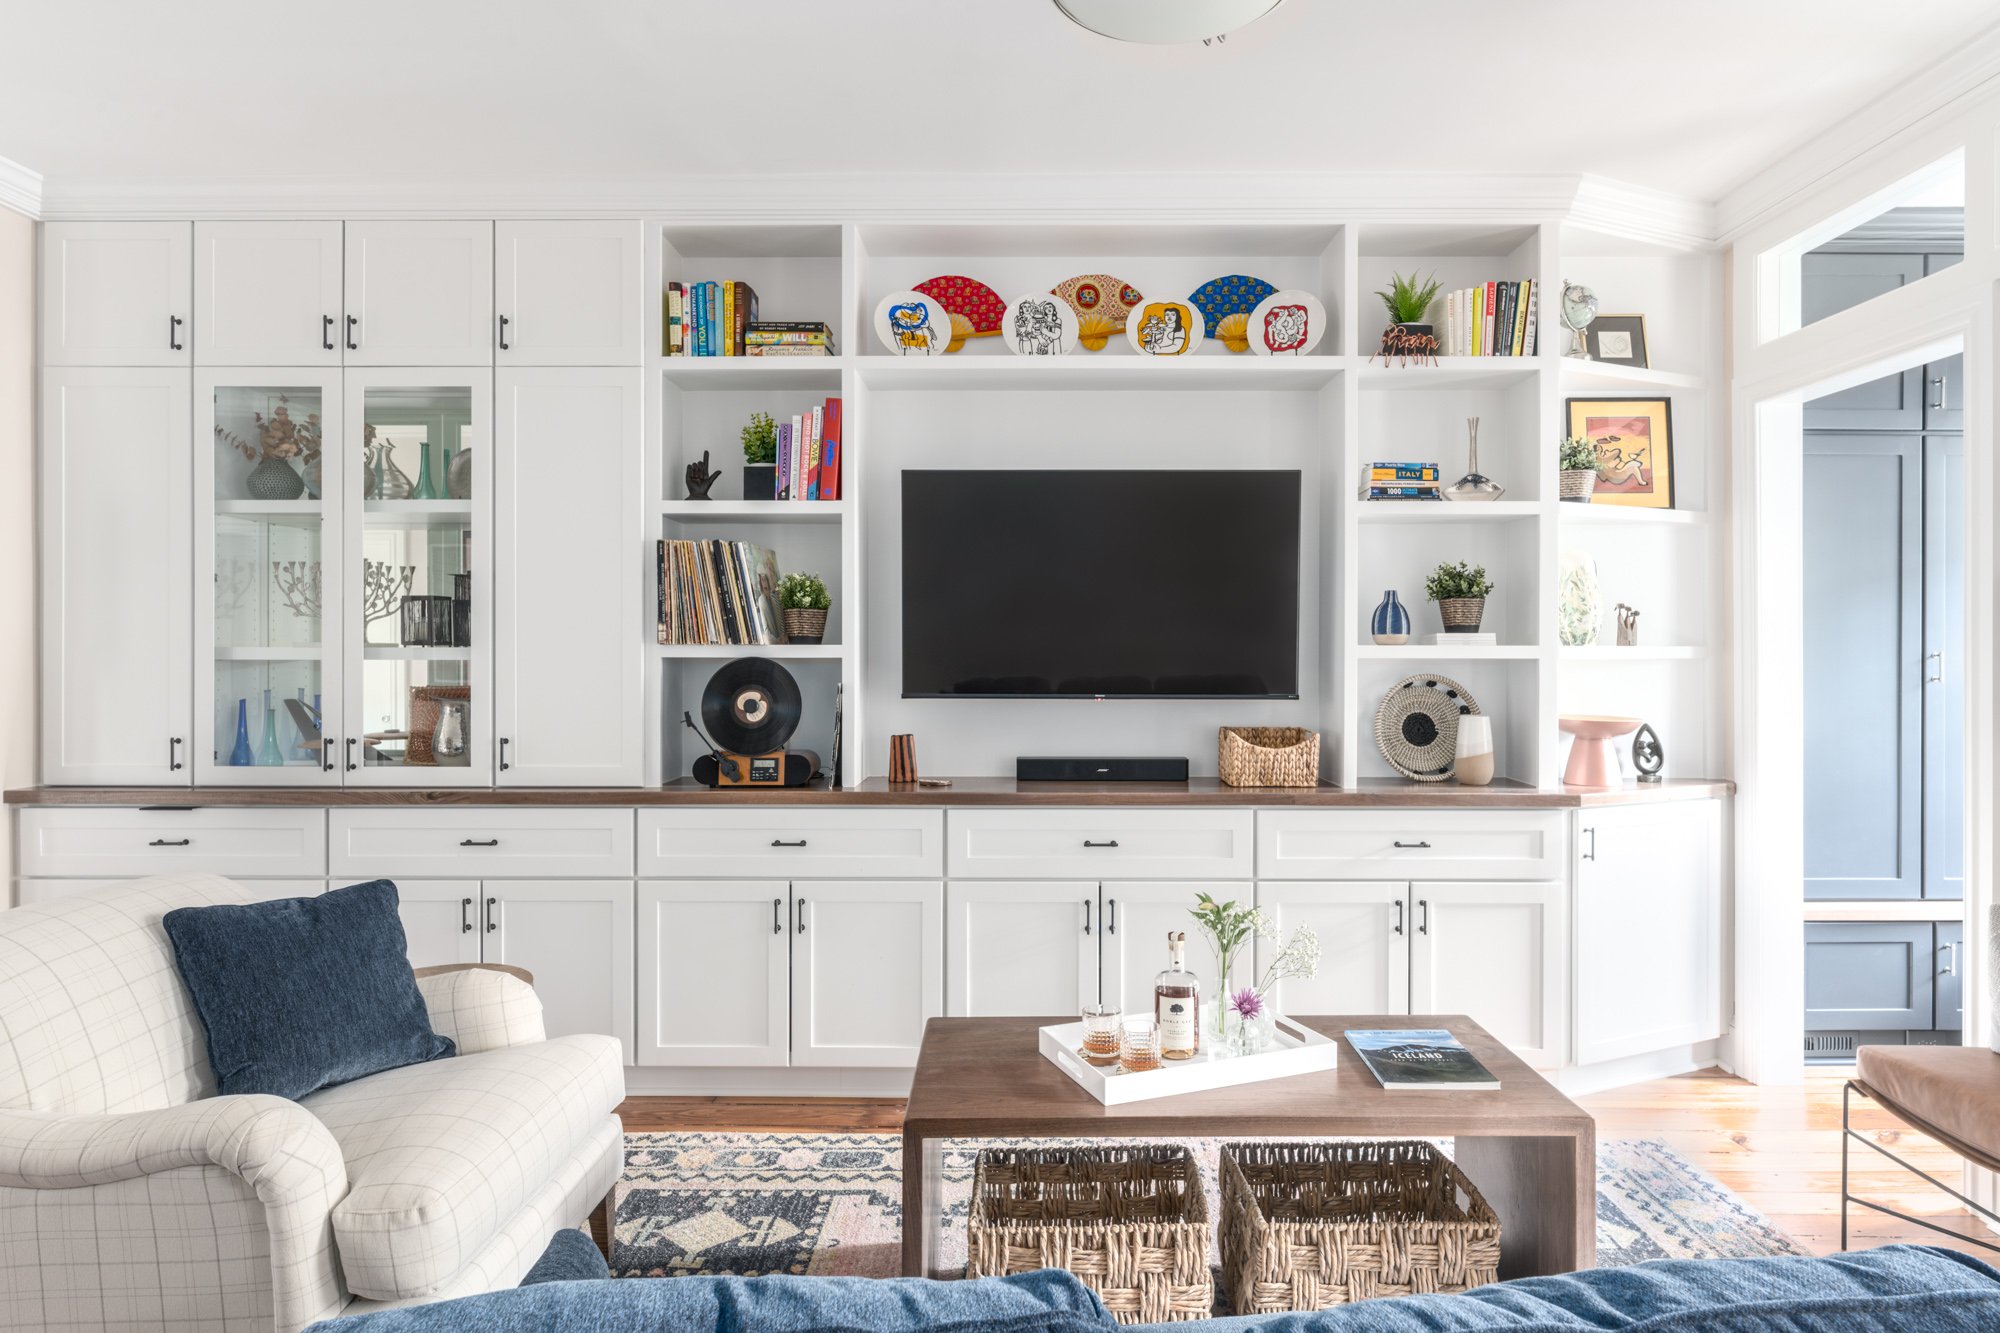
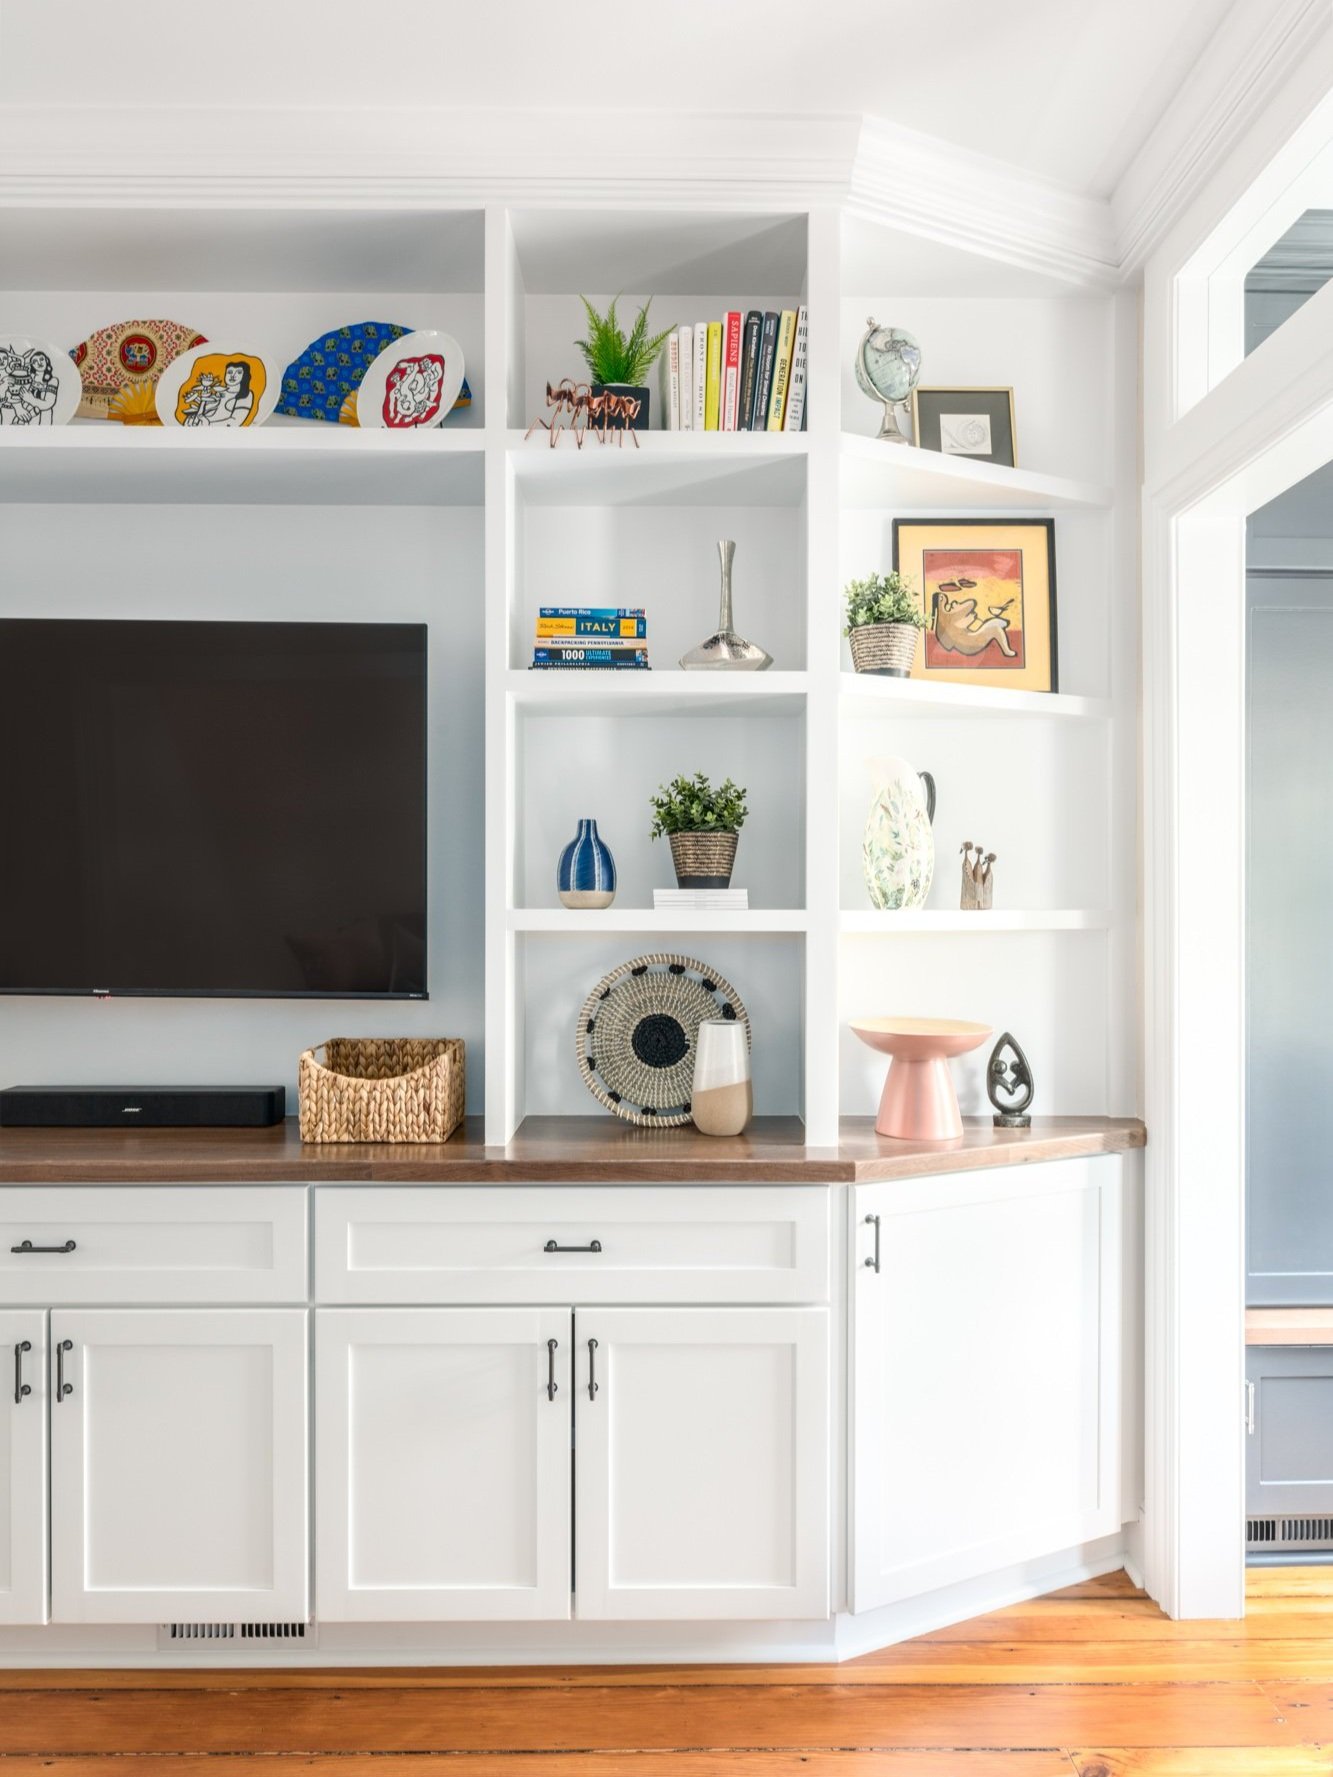
The storage does not end in the mud room. We also designed a 17’ long custom depth built-in in the living space including open decorative shelving, a spot for the TV, records & record player, and a surprising WFH desk!


Hiring an Interior Designer:
Beneficial for you and your project!
A successful home renovation is all about working with an incredible team, and for this project that included our talented contractor Tim Bannon of BW Builders and his team. The collaboration of the clients, contractor and designer are crucial to bring a vision like this to life.
When you hire a designer, we bring out-of-the-box solutions to your unique challenges at home. We have insights from our years of experience that will ultimately save you time and money. For clients that I work with, they also have the added benefit of eco-conscious solutions so that they can feel great about the choices they are making for their home design project.
Planning a design project for your home?
Construction by BW Builders & Photos by Kristina Kroot Photography